Newsletter management
The newsletter management is a separate module in the back end, which you can find in the “Content” group, where you can create several distribution lists (or channels) containing the individual newsletters and recipients. By using multiple distribution lists/channels you can sort the newsletters by topic or language.
Channels
To create a new channel click on ![]() New.
New.
Title and redirection
Title: The title of a channel is only used in the back end overview.
Redirect page: Here you can define to which page a visitor is forwarded when clicking on a link in the front end module “Newsletter list”. This target page should contain the module “Newsletter reader”.
Template settings
E-mail Template: Here you can overwrite the e-mail template.
since 5.3 In addition to mail_default, mail_responsive is also available.
The template for mail_default:
<!DOCTYPE html PUBLIC "-//W3C//DTD HTML 3.2//EN">
<html>
<head>
  <meta http-equiv="Content-Type" content="text/html; charset=<?= $this->charset ?>">
  <meta name="Generator" content="Contao Open Source CMS">
  <title><?= $this->title ?></title>
  <?= $this->css ?>
</head>
<body>
  <?= $this->body ?>
</body>
</html>
The template for mail_responsive:
<!doctype html>
<html>
  <head>
    <meta name="viewport" content="width=device-width, initial-scale=1.0">
    <meta http-equiv="Content-Type" content="text/html; charset=utf-8">
    <title><?= $this->title ?></title>
</head>
<body>
<table role="presentation" border="0" cellpadding="0" cellspacing="0" class="body">
<tr>
<td> </td>
<td class="container">
<div class="content">
<span class="preheader"><?= $this->preheader ?></span>
<table role="presentation" border="0" cellpadding="0" cellspacing="0" class="main">
<tr>
<td class="wrapper">
<?= $this->body ?>
</td>
</tr>
</table>
<div class="footer">
<table role="presentation" border="0" cellpadding="0" cellspacing="0">
<tr>
<td class="content-block">
<span class="apple-link">Company Inc, 7-11 Commercial Ct, Belfast BT1 2NB</span>
<br> Don't like these emails? <a href="#">Unsubscribe</a>.
</td>
</tr>
</table>
</div>
</div>
</td>
<td> </td>
</tr>
</table>
</body>
</html>
Sender settings
Sender e-mail address: Here you have to enter the sender’s e-mail address.
Sender name: Here you can enter the name of the sender.
Mailer transport: In many cases, SMTP servers do not allow the sending of arbitrary sender addresses. In most cases, the sender address must match the SMTP server access data used. However, especially in multi-domain installations of Contao, it can be important that the sender address of the emails that Contao sends matches the respective domain. Therefore, you can create so-called “transports” and select them here.
Newsletters
Newsletters are always sorted according to their dispatch date.
To create a new newsletter click on ![]() or
or
![]() and
then on New
and
then on New ![]() .
.
Subject and newsletter aliases
Subject: Here you can enter the subject of the newsletter email.
Newsletter aliases: The alias of a newsletter is a unique and meaningful reference that you can use to call it up in any browser.
HTML content
You may wonder why you have to enter the text of the newsletter twice. This is because neither the HTML nor the text variant is free from disadvantages, and so we have decided to include both in the newsletter. The recipient’s mail program then decides for itself which variant it can display.
A pure HTML newsletter has the following disadvantages:
- Not all mail clients can display HTML correctly.
- HTML mails are more likely to be classified as spam than plain text mails.
- Externally embedded images are often blocked.
A text newsletter does not have these problems, but you can neither include pictures nor influence the text formatting.
since 5.3 Preheader text: You can enter a preheader text here. A preheader text should be between 40 and 130 characters long. The preheader text is the short text in an email in your inbox after the sender information and the subject line.
HTML content: Enter the HTML content of the newsletter here. The input is done in the same way as for the content element “Text” using the Rich Text Editor.
Text content
Text content: Enter the text content of the newsletter here.
Personalizing the newsletter
If you send newsletters to registered members, you can personalize them using “simple tokens”. Simple tokens work similar to insert tags and can be used in both HTML and text content of a newsletter. Below is a small example:
Dear ##firstname## ##lastname##,

please check and update your data:

Address: ##street##
ZIP / City: ##postal## ##city##
Phone: ##phone##
Email: ##email##

Your administrator
In contrast to insert tags, simple tokens not only allow you to access tl_member field data in the member table, but
also to implement simple if-else queries and thus, for example, to specify the gender of the salutation:
{if gender=="male"}
Dear Mr. ##lastname##,
{elseif gender=="female"}
Dear Ms. ##lastname##,
{else}
Dear Sirs and Madams,
{endif}

[Content of the newsletter]

{if phone==""}
Please update your details and include your phone number.
{endif}

<!-- query on "not empty" -->
{if phone!=""}
We have the following phone number stored by you: ##phone##
{endif}

Your administrator
File attachments
You can add one or more files to each newsletter, which are then sent as e-mail attachments or offered for download on the website.
Add attachments: Here you activate the function.
Attachments: Here you can select the file attachments.
Template settings
There are two things you need to know about the e-mail template:
- It is only used for HTML newsletters.
- It is primarily intended for page layout and not for content.
HTML mails are basically structured like HTML web pages, but unfortunately, e-mail programs cannot handle HTML code like
modern Internet browsers. Therefore the template generates an mail_default outdated HTML 3.2 document, which is
processed by most email clients.
E-Mail Template: Here you select the template for the HTML mail.
since 5.3 In addition to mail_default, mail_responsive is also available.
Sender settings
If you do not provide an individual sender address, the mailing list email address will be used.
Custom sender e-mail address: Here you can enter the e-mail address of the sender.
Custom sender name: Here you can enter the name of the sender.
Mailer transport: In many cases, SMTP servers do not allow the sending of arbitrary sender addresses. In most cases, the sender address must match the SMTP server access data used. However, especially in multi-domain installations of Contao, it can be important that the sender address of the emails that Contao sends matches the respective domain. Therefore, you can create so-called “transports” and select them here.
Expert settings
To send a newsletter as a plain text mail, it is not enough to simply leave the HTML content field empty. You also
have to select the option Send as plain text in the expert settings.
Send as plain textt: Here you deactivate the HTML-sending
External images: Here you can make sure that images are not embedded in HTML newsletters.
Recipients
Usually, the recipients of a newsletter manage themselves using the corresponding front end modules without your intervention as administrator. Nevertheless, you still have the possibility to change recipients manually in the back end. For data protection reasons, only the e-mail address and the activation status are saved.
According to the double opt-in procedure, every subscriber receives an e-mail with a confirmation link when subscribing, without which he cannot complete his subscription. This is sufficient to comply with the provisions of §7 paragraph 2 numbers 2 and 3 of the Law against Unfair Competition (UWG).
To add/edit a subscriber to the distribution list, click
on ![]() and then on New
and then on New ![]() or
or
![]() .
.
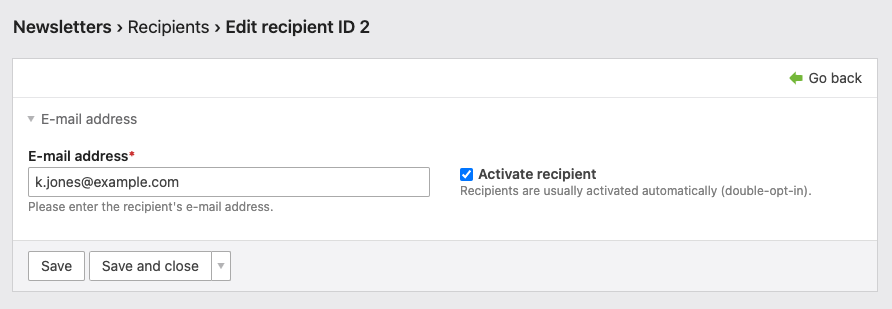
E-mail address: Enter the recipient’s e-mail address here.
Activate recipient: Here you can activate the e-mail address. As long as an e-mail address is not activated, the recipient will not be considered when sending the newsletter. Activation is normally done by clicking on the link in the confirmation mail, but can also be triggered manually.
CSV import
Maybe you have been working with a newsletter system before Contao, and now you are faced with the task of adding
existing recipients to Contao. In this case, the newsletter module offers the function CSV Import.
First export the existing recipients as CSV file. Most programs such as phpMyAdmin or Excel offer a corresponding option to save data in CSV format. Although the name CSV file suggests that only comma separated data can be processed, Contao also accepts semicolons, tabs and line breaks as field separators.
Select the file for import on your computer.
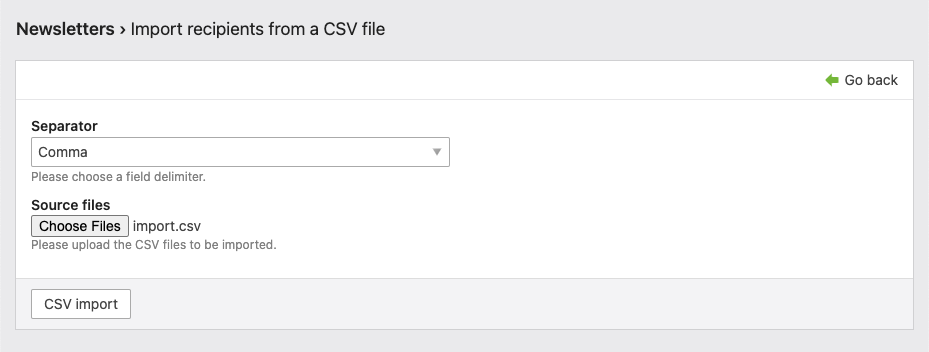
Then start the import by clicking the button CSV-Import.
Send newsletter
You can start sending a newsletter by clicking on the corresponding navigation
![]() symbol in the distribution list
overview, which will take you to a preview page where you can check the configuration and content of the newsletter
again. It is also recommended that you make active use of the button
symbol in the distribution list
overview, which will take you to a preview page where you can check the configuration and content of the newsletter
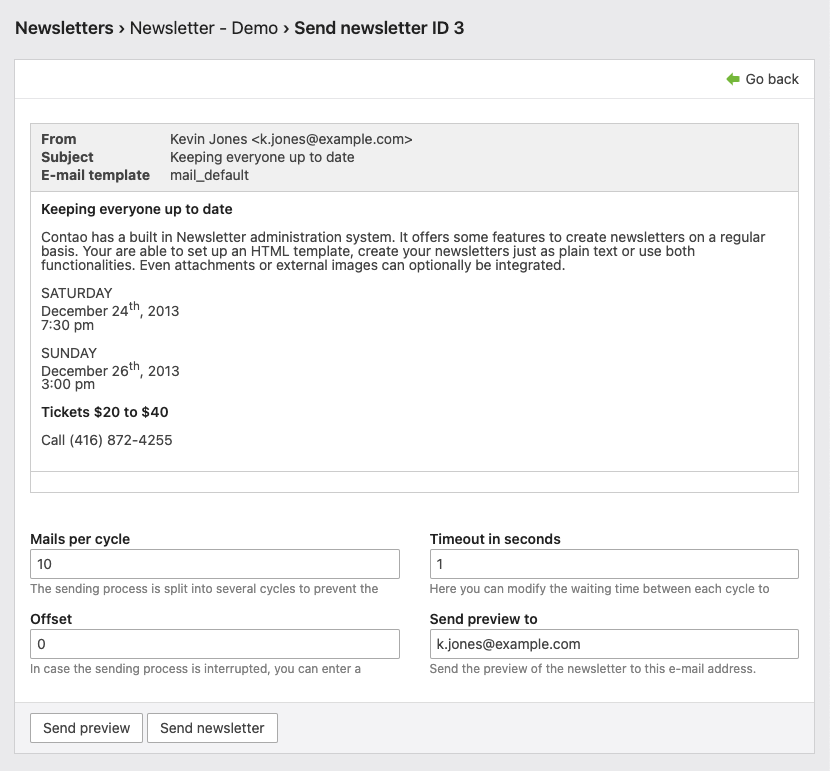
again. It is also recommended that you make active use of the button Send preview. You can change the recipient
address in the field Send preview to.
Calculate server limits
Usually, you will not have rented a private server for your website, but share a so-called shared hosting server with other customers. Since the system resources in shared hosting are available to all customer communities, there are usually certain limits that restrict their use.
For example, if you send a newsletter to 500,000 recipients, the mail server may be busy for a while, during which time you will virtually block the service for all customers. Therefore, the number of emails you can send per minute is usually limited to between 50 and 500.
To accommodate such limitations, Contao does not send all newsletters at once, but divides the sending process into several cycles which you can adjust exactly to the requirements of your mail server.
Mails per cycle: Here you define the number of mails per cycle.
Waiting time in seconds: Here you specify the wait time between each cycle.
Offset: If a send cycle was interrupted, you can specify here from which receiver this should be resumed.
For example, assuming a server limit of 100 emails per minute, and a total number of 10,000 recipients, you can send 10 emails every 6 seconds. The complete sending process would then take 100 minutes.
Resuming interrupted sending
Normally, the sending of a newsletter is completely automated, and you can do other work while it is being sent. You just must not close the Contao browser window or turn off your computer. However, if this happens accidentally, you can resume sending the newsletter as follows:
- Filter the category in the back end under “System” > “System Log” after the last newsletter entry.
- Determine how many newsletters were sent.
- Enter the desired offset in the field
Offset.
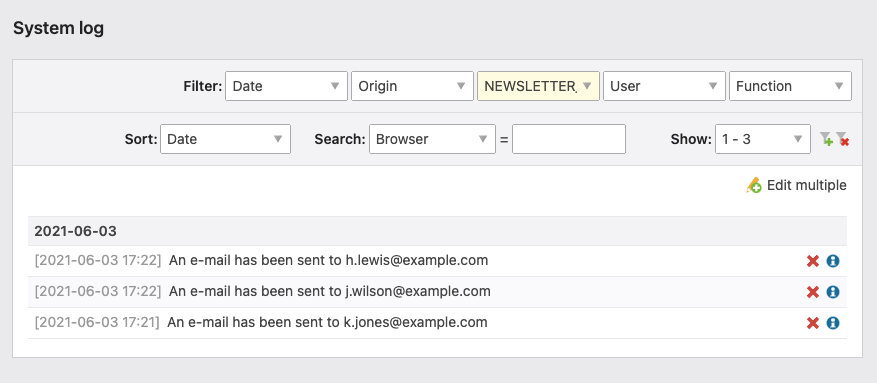
You can find the log data of the transmission in the back end under “System” > “System Log”. The filter category
is called NEWSLETTER_X, where the X stands for the ID of the respective newsletter. The total number of e-mails sent
can be seen in the field Show. For example, if there were 120 mails, enter “120” to continue with the 121st
recipient (counting starts at 0).