Contao Quickstart
In this section, I introduce you to the basic concepts and functionality of Contao in a condensed form. As a CMS beginner, you don’t need to think about it if you have never heard one or the other term before. Everything is explained in detail in the following texts.
Back end and Front end
Contao is divided into two areas. The “back end” is the administration area where all the work such as writing articles is done. The “front end” is the actual website where the written articles can be read by visitors.
Access to the back end, i.e. the administration area, is basically only possible for registered users, who must log in with their username and password before they can make changes to the website, whereas the front end, i.e. the actual website, is publicly accessible by default.
You can access the back end by adding /contao to the URL of your website.
Users and Members
The separation between back end and front end also continues in the user administration. In Contao, we distinguish between “users” who have access to the back end and “members” who have access to the front end. Since the website is publicly accessible by default, creating members is optional and only necessary if you want to create a protected, non-public area, for example. In the minimal configuration, you only need one user, the administrator, and no members at all.
Everything revolves around the page structure
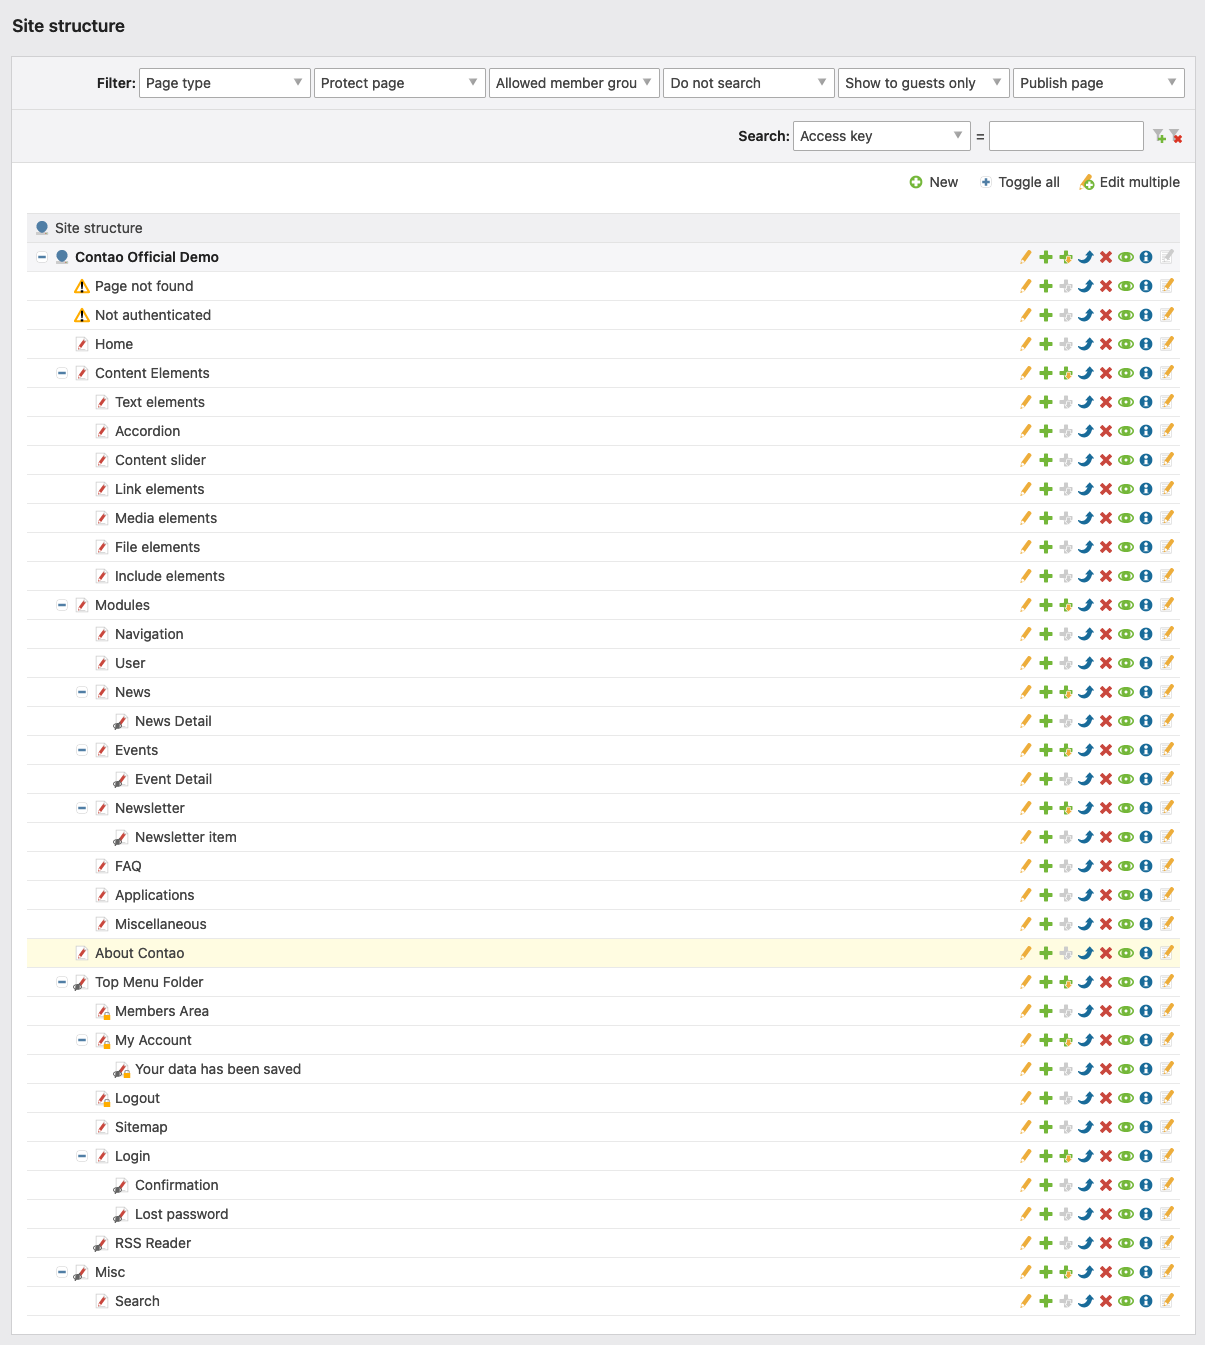
Contao is a page-based content management system, which means that the page structure is the central element of your website. A visitor can only view a specific page in his browser and not, for example, a single article as in other systems. This approach is very flexible because a page can have any amount of content and you are not limited to a single post.
The page structure is organized hierarchically, so you can nest the pages and create any number of subpages. Contao automatically creates navigation menus with all main and sub pages from the hierarchical structure in the front end. When you add a new page in the back end or change the order of the pages, the change is immediately visible on the website.
Each page has a page layout
Each page is linked to a page layout, which determines its structure and divides it into so-called layout areas. In Contao, the page layout is not determined by static template files, but by page layouts that can be assembled with a mouse click. Thanks to the integrated CSS framework, these layouts are dynamically assembled into a “virtual template” at runtime. As long as you have not created at least one page layout, Contao will not know how to display the content of your website and will respond with a short “No layout specified”. By default, you can choose from the following layout areas:
- Header
- Left column
- Main column
- Right column
- Footer
In addition, Contao supports the addition of arbitrary custom layout parts to implement more complex layouts and even the integration of an external layout or the use of a completely different CSS framework if needed.
Each page layout consists of modules
Within the layout areas activated in a page layout, you can place any number of front end modules that are executed in sequence when a page is called and generate the HTML code for the front end.
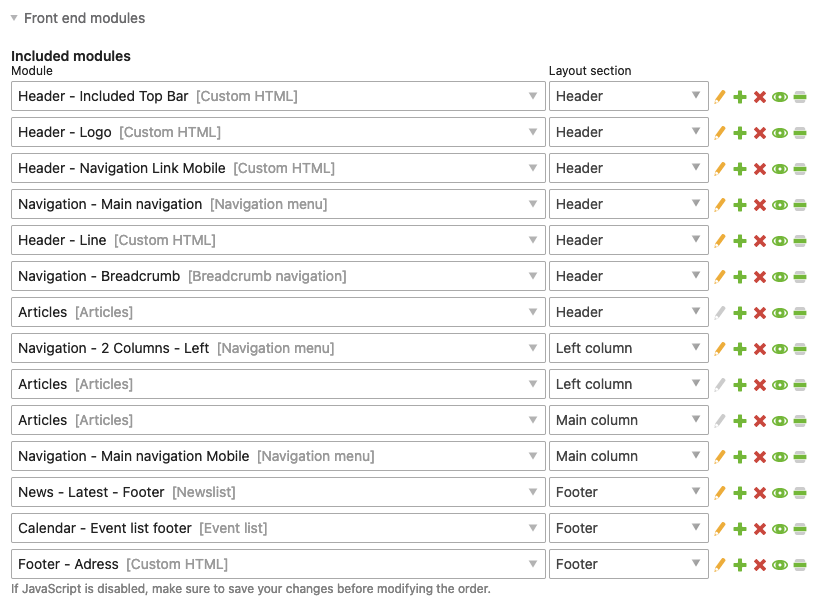
Just like page layouts, front end modules can be created and configured with a mouse click. Contao comes with several types of modules, e.g. for creating navigation menus, managing users or inserting forms. In addition, you can add any number of front end modules with extensions.
Now you will probably notice that it has just been written that you do not even need to know HTML to use Contao. This statement clearly contradicts the quote. Or does it?
In fact, you can use Contao without knowing HTML and CSS. For example, if you are an editor writing articles for a website, you do not need to be interested in CSS. The same applies if you have installed a theme from a third party designer and only create the page structure and content yourself. In both cases, you can use the pre-built theme without any problems - as long as you don’t want to make any changes. The definition of the Contao team really only applies to webmasters who edit all areas of the website themselves and not to editors.
The design can be exported as a theme
When your design is finished, you can export all design-relevant elements as a so-called theme. This includes stylesheets, front end modules, page layouts, files and any customized templates. The theme can then be imported into another Contao installation so that you can easily reuse or share your design. You can also import themes from other designers and use them for your website.
Content is saved as articles
The actual content - until now, it was only about the page structure and design - is stored in Contao as articles. Each article consists of content elements that provide input and output functions for each content type, such as text, images or tables.
The concept of content elements has many advantages. For example, the risk of redundant or even invalid HTML code is reduced compared to using a rich text editor because each element is generated separately, and it is easy to move individual elements between articles or change the order of the elements. Thanks to Ajax, the latter is even possible via drag & drop.
Each article is assigned to a page
Each article is permanently linked to a specific page. You can create any number of articles per page and assign them to different layout areas. You are not limited to one article in the main column, but can create five articles in the main column and one in the side column. After all, it is the visitor who calls up the page and not a specific article (see section Everything revolves around the page structure).
An exception to this concept of static articles are dynamic articles such as news or events, which are managed in separate back end modules and output with special front end modules such as a news list or calendar. I mention this here because you may have wondered if you really need to create a separate page plus an article for each blog post. But of course this is not the case and would be impractical for an active blog or calendar with many entries.