List data records
Contao stores all information about your website in its database. This includes back end data like users, modules, pages or articles as well as frontend data like guestbook entries or comments. All this data is collected in different tables and can be listed, searched, copied, moved, deleted or edited in the back end.
The different views
The three most common forms of listings, which are called views below, are the simple list (“List View”), the list grouped by the parent table (“Parent View”) and the tree view (“Tree View”).
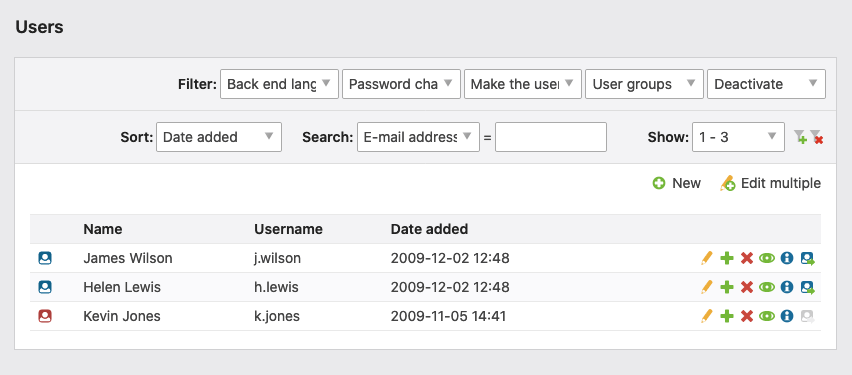
List View
These are records from a single table that are listed in a certain order, usually alphabetically, and the rows are grouped by their first letter.
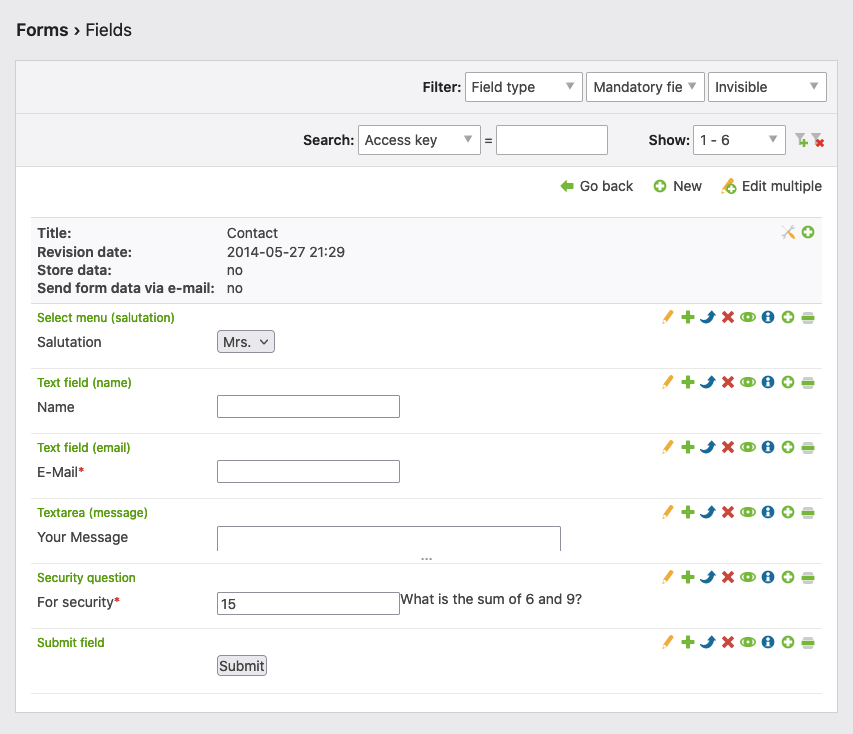
Parent View
These are records that have a parent-child relationship with the records in a second table. Imagine two shopping baskets and the products they contain. In each shopping basket, i.e. parent element, there can be any number of products, i.e. child elements.
In Contao, such parent-child relationships are very common, e.g.
- articles and content elements,
- Archives and news items or
- Image sizes and media queries.
When you list the contents of a shopping cart, you only want to see the products of this shopping cart and not the products of the second one. Therefore, Contao shows you only the child elements of the selected parent element in the Parent View.
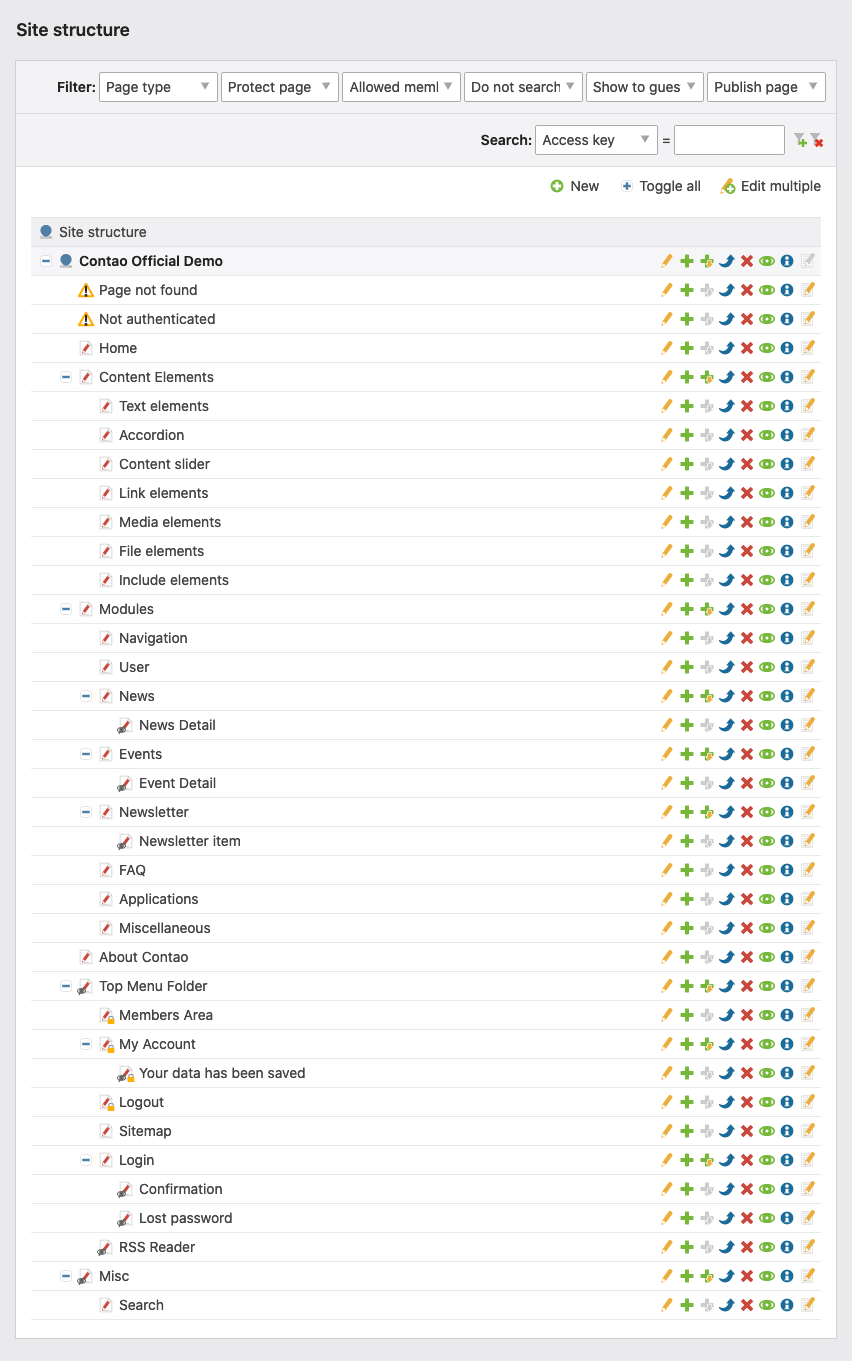
Tree View
These are data records that are hierarchically dependent on each other and are therefore displayed in a tree structure. Typically, this is the case with a file system that has directories and subdirectories, so the Contao file manager also uses this view. Hierarchical structures can also be displayed within a table, like the page structure of your website.
Sort and filter records
To keep track of tables with many records, Contao offers you several ways to sort and filter your listings. Most listings can be filtered so that you only see the records that you really need for a specific action.

Filtering: Here you can set one or more filters to show only the members who are male and speak German.
Sort: Here you define the field by which the listing is sorted.
Find: Here you can search a field for a specific value so that only those records are displayed that contain the
term you are searching for. The query supports so-called regular expressions, which means you can search for the
term you want. B. Retrieve ^a all records that begin with the letter A, or similarly, a$ all those that end with
the letter A. The search for meier|schmidt, which finds both Mr. Meier’s and Mr. Schmidt’s accounts, is also
extremely helpful.
Display: Here you can limit the number of records per page. This filter is always active by default and set to 30 records, as listing several hundred records can take quite some time.
All filters can be combined with each other. Active filters are highlighted in yellow, so you can see at a glance which filters you have set. To deactivate a filter, select the top entry from the drop-down menu or delete the search term from the search field.
By clicking on the following icons the filters can be applied or reset:
![]() Apply filter: set the filters and apply them
afterwards.
Apply filter: set the filters and apply them
afterwards.
![]() Reset filter: the filter selection reset.
Reset filter: the filter selection reset.
The navigation icons
Surely you have noticed the colorful icons that appear in each view to the right of each record. With these navigation icons you can edit, copy, move or delete single data records.
Standard Icons
The following navigation icons appear in almost all views. For reasons of clarity, they are not additionally provided with a text. However, if you position the pointer of your mouse over an icon, the corresponding description will be shown.
![]() Edit: calls a specific record in edit mode.
Edit: calls a specific record in edit mode.
![]() Duplicate: creates a copy of an existing record.
Duplicate: creates a copy of an existing record.
![]() Delete: deletes a record (this process can be revoked).
Delete: deletes a record (this process can be revoked).
![]() Publish/unpublish: show or hide in the
frontend
Publish/unpublish: show or hide in the
frontend
![]() Info: shows information about a record.
Info: shows information about a record.
Icons in List View
The List View can offer the following additional commands besides the basic commands.
![]()
![]() Edit settings: adjust the settings for the parent
element.
Edit settings: adjust the settings for the parent
element.
since 5.0 ![]() Edit settings: adjust
the settings for the parent element.
Edit settings: adjust
the settings for the parent element.
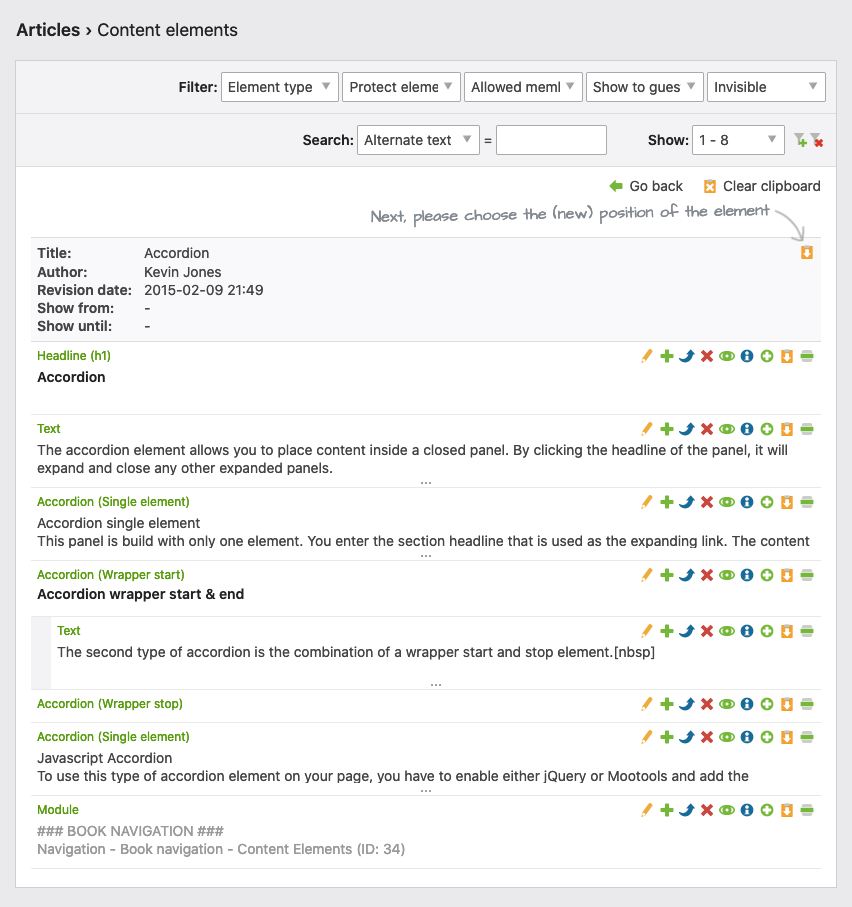
Icons in the Parent View
The Parent View offers two additional icons to determine the order of the data records. The sequence can also be
changed by drag & drop. Simply click on the Drag & Drop icon![]() and move to the new position.
and move to the new position.
![]()
![]() Move: Moves a record to another position.
Move: Moves a record to another position.
![]() New Item: creates a new record after the current record.
New Item: creates a new record after the current record.
![]() Insert: inserts a record after the current record
Insert: inserts a record after the current record
![]() Move: Move a file or folder using drag and
drop.
Move: Move a file or folder using drag and
drop.
Icons in the Tree View
In the tree view, there are other icons that are necessary because of the hierarchical relationships between the records. For example, when moving or duplicating records, you need a way to specify whether they should be inserted after a record in the same level or below a record in a new level.
![]()
![]() Duplicate subpages: duplicates a page including all subpages.
Duplicate subpages: duplicates a page including all subpages.
![]() Edit page: edit the page.
Edit page: edit the page.
![]() Insert after: inserts a page after the current page.
Insert after: inserts a page after the current page.
![]() Insert Below: inserts a page below the current page
Insert Below: inserts a page below the current page
![]() Edit Article: edit the article on the page.
Edit Article: edit the article on the page.
The clipboard
The clipboard is not a separate application that you can call and view anywhere. It is automatically active in the background and remembers the records you want to duplicate or move. This makes it possible to move records beyond the boundaries of a parent element.
You can think of the clipboard as the clipboard on your computer, where you can copy [Ctrl]+[c]certain data to and
paste them to [Ctrl]+[v]another place. In Contao, you can move content elements from one article to another.
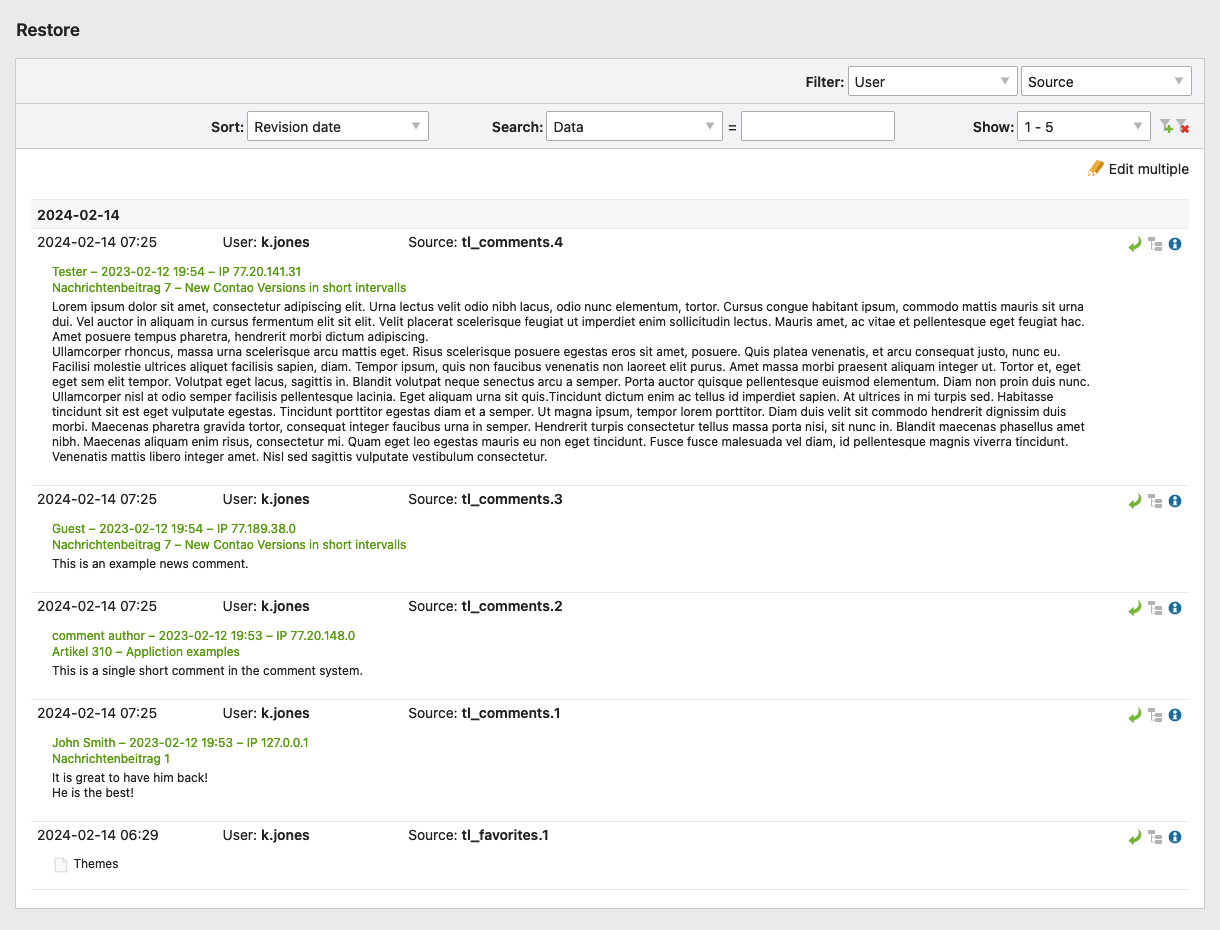
Restore deleted records
Whenever you delete one or more records, they are not immediately removed from the database, but moved to a virtual trashcan. You can retrieve the data from this recycle bin at any time and restore it to its original location.
You will find the “Recycle Bin” in the navigation area in the group System under the item Restore. There you will see a
list of all deleted records, which you can sort by either the date of deletion or the origin of the record. You can
undo a deletion by clicking on the corresponding navigation icon![]() .
.