Media elements
Image
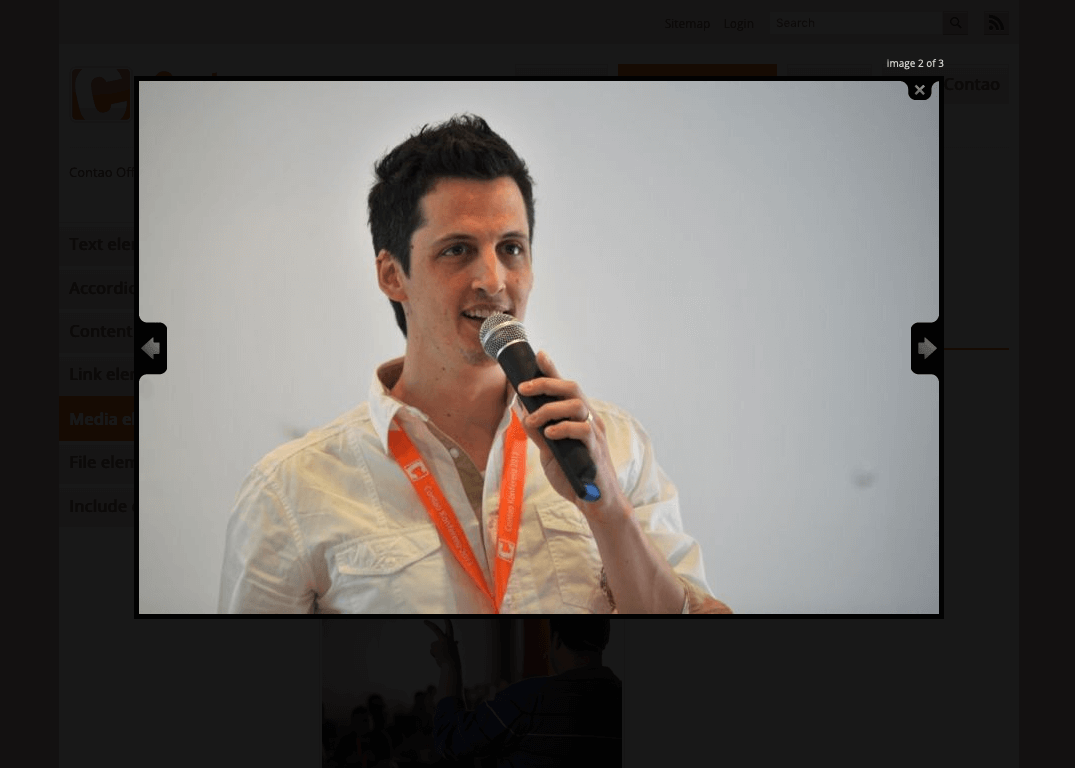
The content element “Image” adds an image to the article. An image can have a large view or it can be an image link to a specific URL.
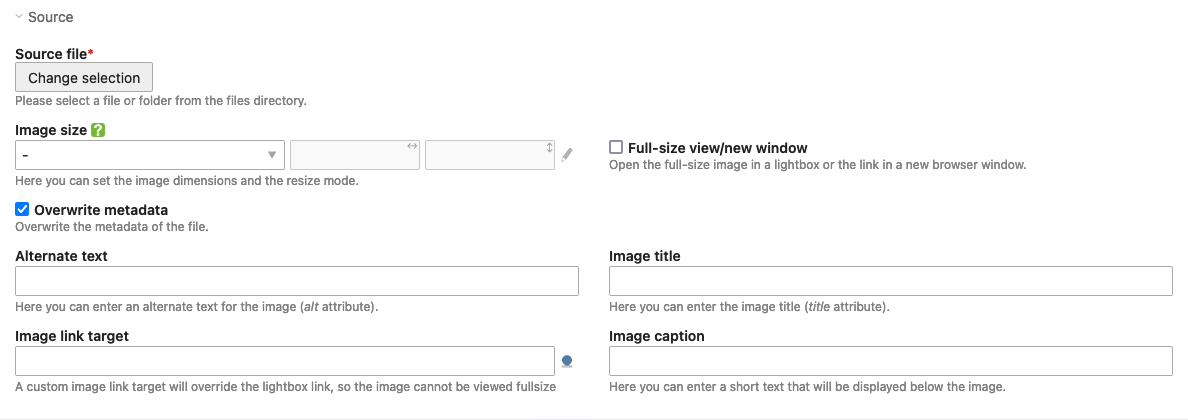
Source
Source file: Here you select the image to be used.
Image size: Here you can specify the dimensions of the image. See the Text section for more information.
Full-sizeview/new window: If this option is selected, the image will be opened in its original size when clicked. This option is not available for linked images.
Overwrite metadata: Here you can overwrite the metadata from the file manager.
Alternate text: An accessible web page should contain a short description for each object, which is displayed if the object itself cannot be displayed. Alternative text is also evaluated by search engines and is therefore an important tool for onpage optimization.
Image title: Here you can enter the title of the image (title attribute).
Image link target: When clicking on a linked image, you will be redirected to the specified target page (corresponds to an image link). Please note that for a linked image a lightbox full view is no longer possible.
Image caption: Here you can enter a caption.
Template settings
Content element template: Here you can overwrite the content element ce_image template.
HTML output
The element generates the following HTML code:
<div class="ce_image first last block">
    <figure class="image_container">
        <a href=…" title="…" data-lightbox="…">
            <img src="…" alt="…" itemprop="image">
        </a>
        <figcaption class="caption">…</figcaption>
    </figure>
</div>
Content element template: Here you can overwrite the content element content_element/image template.
HTML output
The element generates the following HTML code:
<div class="content-image">
    <figure>
        <a class="cboxElement" href=…" title="…" data-lightbox="…">
            <img class="…" src="…" alt="…" height="…" width="…">
        </a>
        <figcaption>…</figcaption>
    </figure>
</div>
Gallery
The content element “Gallery” adds a picture gallery to the article, i.e. a collection of several thumbnails that are listed in a list and are enlarged when clicked. With so many images, the gallery can be spread over several pages.
Source
Source files: Here you can select one or more folders or files to be included in the gallery. If you select a folder, Contao will automatically add all images in the folder to the gallery. You can rearrange the individual images by dragging them.
Use home directory: Use the home directory as file source if there is an authenticated member.
Order by: Here you can choose the sort order. The following sort orders are available:
- Custom order
- File name (ascending)
- File name (descending)
- Date (ascending)
- Date (descending)
- Random order
Ignore files without metadata: If no metadata for the appropriate page language has been entered for the files, they are not displayed when activated.
Image settings
Image size: Here you can specify the dimensions of the image. See the Text section for more information.
Thumbnails per row: Here you can set the number of thumbnails per row.
Items per page: Contao can automatically spread large image galleries over multiple pages to reduce the loading time of the gallery. Set the maximum number of thumbnails per page here.
Number of items: Here you can limit the total number of images. Enter 0 to display all.
Full-size view/new window: If this option is selected, the image will be opened in its original size in the Lightbox when clicked (JavaScript is required for this).
Template settings
Gallery template: Here you can overwrite the gallery template.
Content element template: Here you can overwrite the content element ce_gallery template.
HTML Output
The element generates the following HTML code:
<div class="ce_gallery first last block">
    <ul class="cols_2">
        <li class="row_0 row_first row_last even col_0 col_first">
            <figure class="image_container">
                <a href="…" data-lightbox="…">
                    <img src="…" alt="…">
                </a>
            </figure>
        </li>
        <li class="row_0 row_first row_last even col_1 col_last">
            <figure class="image_container">
                <a href="…" data-lightbox="…">
                    <img src="…" alt="…">
                </a>
            </figure>
        </li>
    </ul>
    <!-- indexer::stop -->
    <nav class="pagination block" aria-label="Pagination menu">
        <p>Page 1 of 2</p>
        <ul>
            <li><strong class="active">1</strong></li>
            <li><a href="…" class="link" title="Go to page 2">2</a></li>
            <li class="next"><a href="…" class="next" title="Go to page 2">Vorwärts</a></li>
        </ul>
    </nav>
    <!-- indexer::continue -->
</div>
Content element template: Here you can overwrite the content element content_element/gallery template.
HTML Output
The element generates the following HTML code:
<div class="content-gallery--cols-2 content-gallery"">
    <ul data-list-paginate="ready">
        <li style="display: revert;">
            <figure>
                <a href="…" data-lightbox="…" class="cboxElement">
                    <img src="…" alt="…" srcset="…" sizes="…" width="…" height="…" loading="lazy" class="…">
                </a>
            </figure>
        </li>
        <li style="display: revert;">
            <figure>
                <a href="…" data-lightbox="…" class="cboxElement">
                    <img src="…" alt="…" srcset="…" sizes="…" width="…" height="…" loading="lazy" class="…">
                </a>
            </figure>
        </li>
    </ul>
    <nav data-pagination="" aria-label="Pagination menu">
        <ul>
            <li><a href="#" data-page="1" title="Go to page 1" class="active">1</a></li>
            <li><a href="#" data-page="2" title="Go to page 2">2</a></li>
        </ul>
    </nav>
</div>
Video/Audio
The content element “Video/Audio” adds a video or audio file to the article.
Source
Video/audio files: Here you can add the video/audio file or, if you use different codecs, the video/audio files.
Player settings
Player options: Here you can select the different player options.
- Autoplay
- Hide the controls
- Playing in a loop
- Play inline (no fullscreen mode)
- Mute the audio output
Player size: Here you can set the width and height of the media player in pixels (e.g. 640x480).
Preloading: Here you can tell the browser how to preload the video. There are three options “Auto (preload the entire video)”, “Metadata (preload the metadata only)” and “None (do not preload anything)
Caption: You can enter a caption here.
Start at: Playback starts at the specified number of seconds. Enter 0 to disable the feature.
Stop at: Playback will stop at the specified number of seconds. Enter 0 to disable the feature.
Preview image
Preview image: Show this image instead of the first frame of the video before playback.
Template settings
Content element template: Here you can overwrite the content element ce_player template.
HTML Output
The element generates the following HTML code:
<div class="ce_player block">
    <figure class="video_container">
        <video width="…" height="…" autoplay loop playsinline muted>
            <source type="video/mp4" src="…" title="…">
        </video>
        <figcaption class="caption">……</figcaption>
    </figure>
</div>
Content element template: Here you can overwrite the content element content_element/player template.
HTML Output
The element generates the following HTML code:
<div class="content-player">
    <figure>
        <video width="…" height="…" autoplay loop playsinline muted>
            <source type="video/mp4" src="…" title="…">
        </video>
        <figcaption>……</figcaption>
    </figure>
</div>
Vimeo
The content element “Vimeo” adds a Vimeo video to the article.
Source
Vimeo ID: Please enter the Vimeo video ID (for example, 275028611).
Player settings
Player options: Here you can select the different player options.
- Autoplay
- Play in a loop
- Hide the profile image
- Hide the title
- Hide the author
Player size: Here you can set the width and height of the media player in pixels (e.g. 640x480).
Aspect ratio: Here you can set the aspect ratio of the video to make it responsive.
Caption: Here you can enter a caption for the image.
Start at: Playback starts at the specified number of seconds. Enter 0 to disable the feature.
Controls color: Here you can enter a hexadecimal color code (for example, ff0000) for the controls.
Splash image
Use a splash image: The video will not load until the user clicks on the splash image.
Source file: Here you select an image from the file overview.
Image size: Here you can specify the dimensions of the image. See the Text section for more information.
Template settings
Content element template: Here you can overwrite the content element ce_vimeo template.
HTML Output
The element generates the following HTML code:
<div class="ce_vimeo block">
    <figure class="video_container">
        <div class="responsive ratio-169">
            <a id="splashImage" href="…">
            <img src="…" alt="…">
            </a>
            <script>
                document.getElementById('splashImage').addEventListener('click', function(e) {
                    e.preventDefault();
                    var iframe = document.createElement('iframe');
                    iframe.src = this.href;
                    iframe.width = '…';
                    iframe.height = '…';
                    iframe.setAttribute('allowfullscreen', '');
                    this.parentNode.replaceChild(iframe, this);
                });
            </script>
        </div>
        <figcaption class="caption">…</figcaption>
    </figure>
</div>
Content element template: Here you can overwrite the content element content_element/vimeo template.
HTML Output
The element generates the following HTML code:
<div class="content-vimeo"">
    <figure class="spect aspect--16:9">
        <button data-splash-screen="">
            <img src="…" alt="…" srcset="…" sizes="…" width="…" height="…" loading="lazy" class="…">
            <p>Please click to load the video. Your IP address will be transmitted to Vimeo.</p>
            <template>
                <iframe width="" height="" src="…" allowfullscreen=""></iframe>
            </template>
        </button>
        <figcaption>…</figcaption>
    </figure>
</div>
YouTube
The YouTube content element adds a YouTube video to the article.
Source
YouTube ID: Please enter the YouTube video ID for your video (e.g. rOGhp63Lvbo).
Player settings
Player options: Here you can select the different player options.
- Autoplay
- Hide the controls
- Show captions by default
- Hide the fullscreen button
- Using the Contao page language
- Hide annotations
- Hide the YouTube logo
- Limit related videos to the same channel
- Use the youtube-nocookie.com domain
- Loop video
Player size: Here you can set the width and height of the media player in pixels (e.g. 640x480).
Aspect Ratio: Here you can set the aspect ratio of the video to make it responsive.
Caption: You can enter a caption here.
Start at: Playback starts at the specified number of seconds. Enter 0 to disable the feature.
Stop at: Playback will stop at the specified number of seconds. Enter 0 to disable the feature.
Splash image
Use a splash image: The video will not load until the user clicks on the splash image.
Source file: Here you select an image from the file overview.
Image size: Here you can specify the dimensions of the image. See the Text section for more information.
Template settings
Content element template: Here you can overwrite the content element ce_youtube template.
HTML Output The element generates the following HTML code:
<!-- indexer::stop -->
<div class="ce_youtube block">
    <figure class="video_container">
        <div class="responsive ratio-169">
            <a id="splashImage" href="…">
                <img src="…" alt="…" itemprop="image">
            </a>
            <script>
                document.getElementById('splashImage').addEventListener('click', function(e) {
                    e.preventDefault();
                    var iframe = document.createElement('iframe');
                    iframe.src = this.href;
                    iframe.width = '…';
                    iframe.height = '…';
                    iframe.setAttribute('allowfullscreen', '');
                    this.parentNode.replaceChild(iframe, this);
                });
            </script>
        </div>
        <figcaption class="caption">…</figcaption>
    </figure>
</div>
<!-- indexer::continue -->
Content element template: Here you can overwrite the content element content_element/youtube template.
HTML Output The element generates the following HTML code:
<div class="content-youtube">
    <figure class="aspect aspect--16:9">
        <button data-splash-screen="">
            <img src="…" alt="" srcset="…" sizes="…" width="…" height="…" loading="lazy" class="…">
            <p>Please click to load the video. Your IP address will be transmitted to YouTube.</p>
            <template>
                <iframe width="…" height="…" src="…" allowfullscreen="" allow="fullscreen"></iframe>
            </template>
        </button>
        <figcaption>…</figcaption>
    </figure>
</div>