Calendar management
The event management is a separate module in the back end called “Events”, which you can find in the “Content” group. You can create multiple calendars there, which in turn contain the individual appointments or events. By using multiple calendars, a categorization of the entries is possible.
Calendar
Archives are used to group and/or categorize calendars. Each archive can be related to a specific language or topic.
To create a new calendar, click
![]() New.
New.
Title and redirect page
Title: The title of a calendar is used in the back end overview.
Redirect page*: Here you define which page a visitor is redirected to when clicking on an event. This landing page should contain the Event Reader module to display the full post.
Access protection
Just like content elements, calendars can also be protected. The events of the calendar are then only shown to registered members.
Protect calendar: Here you activate the access protection.
Allowed member groups: Here you define which member groups should have access to the calendar after logging in to the front end.
Comments
You already know the Contao comment function from the “News/Blog” extension or the include element with the same name (comments). It is also available for calendars and events.
Enable comments: Here you activate the comment function for the calendar.
Notify: Here you can specify whether the system administrator, the author of a post or both are notified when new comments are made.
Sort order: Here you define the order of the comments.
Comments per page: Here you can set the number of comments per page. Contao automatically creates a page break when it is needed.
Moderate comments: If you select this option, comments will not appear on the website immediately, but will appear after you have shared them in the back end.
Allow BBCode: If you select this option, your visitors can use BBCode to format their comments. The following tags are supported:
| Day | Declaration |
|---|---|
[b][/b] |
Boldface |
[i][/i] |
Italics |
[u][/u] |
Underlined |
[img][/img] |
Insert image |
[code][/code] |
Insert program code |
[color=#f00][/color] |
Coloured text |
[quote][/quote] |
Insert quote |
[quote=Tim][/quote] |
Insert quote with mention of the author |
[url][/url] |
Insert link |
[url=http://example.com][/url] |
Insert link with link title |
[email][email] |
Add an e-mail address |
[email=info@example.com][/email] |
Insert e-mail address with title |
Require login to comment: If you select this option, only logged in members can add comments. However, comments already submitted will still be visible to all visitors of the website.
Disable spam protection: By default, visitors are required to answer a security question when creating comments to prevent the commenting feature from being misused for spam purposes. However, if you want to allow only logged in members to comment, you can disable the security question here. Since Contao 4.4, this question is only “displayed” to spambots.
RSS feeds
Each calendar can be exported as RSS feed if desired. RSS feeds are XML files containing your contributions, which can be subscribed to with an RSS reader and integrated into another website, for example.
The feeds can be integrated via the page layout in the
header of the page. The “header” is not the header of your page layout, but the <head> tag of the HTML source code.
To create a new feed click on ![]() RSS feeds and then click on
RSS feeds and then click on ![]() New.
New.
Title and language
Title: The title is output as a feed title in the XML file.
Feed alias: The alias of a feed is used as the file name.
Feed language: Here you can enter the language of the feed.
Calendars
Calendars: Here you define which calendars are included in the feed.
Feed settings
Feed format: Here you define the format of the feed. Contao supports RSS 2.0 and Atom, the two most popular formats.
Export settings: Here you can specify whether only the teaser texts of the posts or the complete posts are exported as feed.
Maximum number of items: Here you can limit the number of posts in the feed. Usually about 25 posts per feed are sufficient. Most of the time only the first three to five are actually used anyway.
Base URL: The base URL is especially important in multi-domain operation if you run several websites with one Contao installation. To make sure that the feed links to the correct domain, you can enter it here.
Feed description: Here you can enter a description of the feed.
Image settings
Image size: Here you can specify the desired image size. You can choose between the following scaling modes:
| Custom dimensions | |
|---|---|
| Crop (important part) | Preserves the important part of an image as specified in the file manager. If necessary, the image will be cropped. |
| Proportional | The longer side of the image is adjusted to the given dimensions and the image is resized proportionally. |
| Fit the box | The shorter side of the image is adjusted to the given dimensions and the image is resized proportionally. |
Events
This section explains how to create an event. Events are always sorted by date, so there are no icons to change the order.
The events consist of the event settings (“Event list”) and their contents (“Event reader”).
To create a new event, click on the desired archive ![]() or
or ![]() and then on
and then on![]() New.
New.
Title and author
Title: Here you can enter the title of the event.
Featured event: Here you can display the event in a list of featured events.
Event Alias: The alias of an event is a unique and meaningful reference that you can use to call it up in your browser.
Author: Here you can change the author of the event.
Date and time
Add time: If you select this option, you can add a time to the event. Otherwise, Contao assumes that the event will last a whole day.
Start time: Here you enter the start time of the event.
End time: Here you enter the end time of the event. To create an event with an open end, do not fill out this field.
Start date: Here you enter the start date of the event.
End date: Here you enter the end date of the event. If you do not fill in this field, Contao automatically assumes that the event will last one day.
Redirect target
The redirection destination determines to which page a visitor is redirected when clicking on an event, usually the page on which the front end module “Eventleser” is integrated to display the complete event.
Redirect target: Here you can set the forwarding destination.
| Redirect target | Explanation |
|---|---|
| Use default 1 | You will be redirected to the page you specified in the archive settings. On this page the front end module “news reader” should be included. |
| Page 2 | The redirection is to a specific page in the page structure. |
| Article 3 | The redirection is to a specific article. |
| Custom URL 4 | The redirection is to an individual URL. |
Link text: Here you can overwrite the standard text of the “Read more…” link. 1 2 3 4
since 5.3 Canonical URL: Here you can define an individual canonical URL such as https://www.example.com/. 1
Redirect page: Here you can select the destination page from the page structure. 2
Article: Here you select the destination article. 3
Link target: Here you enter the URL of the external target page. 4
Open in a new window: Here you can determine whether the external target page is opened in a new browser window or not. 4
Metadata
Meta title: Here you can enter an individual meta-title to overwrite the default page title.
Output in source code:
<title>Page title</title>
Robots tag: The robots tag defines how search engines treat a page.
- index: add the page to the search index
- follow: follow the links on the page
- noindex: do not include the page in the search index
- nofollow: do not follow the links on the page
The default case is index,follow, because we want Google and other search engines to include our pages in the search index. However, certain pages, such as the imprint or the registration page, can be excluded from indexing using the setting noindex,nofollow.
Output in source code:
<meta name="robots" content="index,follow">
Meta description: Here you can enter an individual meta description to override the default page description.
Output in source code:
<meta name="description" content="Description of the page (between 150 and 300 characters).">
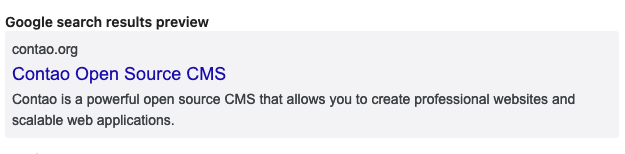
Google search results preview: Here you can preview the metadata in the Google search results. Other search engines might show longer texts or crop at a different position.
Event details
Location name: Here you can enter the name of the event location.
Location address: Here you can enter the address of the event location.
Event teaser: Here you can enter a short summary of the event, which will be displayed e.g. with the module “Event list”, followed by a read more link.
Image settings
Add an image: You can add an image to your post if you wish.
Source file: Here you select the image to be inserted. If you have not yet transferred the image to the server, you can do so directly in the pop-up window without leaving the input mask.
Full-size view/new window: If this option is selected, the image will be opened in its original size when clicked. This option is not available for linked images.

Image size: Here you can specify the desired image size. You can choose between the following scaling modes:
| Custom dimensions | |
|---|---|
| Crop (important part) | Preserves the important part of an image as specified in the file manager. If necessary, the image will be cropped. |
| Proportional | The longer side of the image is adjusted to the given dimensions and the image is resized proportionally. |
| Fit the box | The shorter side of the image is adjusted to the given dimensions and the image is resized proportionally. |
Image Alignment: Here you set the alignment of the image. If it is inserted
![]() above,
above, ![]() below,
below,
![]() left-aligned or
left-aligned or ![]() right-aligned. When left- or right-aligned, the text flows around the image (as symbolized by the icon).
right-aligned. When left- or right-aligned, the text flows around the image (as symbolized by the icon).
Overwrite metadata: Here you can overwrite the metadata from the file manager.
Alternate text: Here you can enter an alternate text for the image (alt attribute). Accessible web pages should contain a short description for each object, which is displayed if the object itself cannot be displayed. Alternate texts are also evaluated by search engines and are therefore an important tool for onpage optimization.
Image title: Here you can enter the title of the image (title attribute).
Image link target: If you click on a linked image, you will be redirected to the specified destination page (corresponds to an image link). Please note that for a linked image a lightbox large view is no longer possible.
Image caption: Here you can enter a caption.
Recurrence settings
If necessary, you can repeat an event at certain intervals. Possible entries are, for example, every four days, every two weeks, every five months or every year.
Repeat event: Here you activate the repeat function.
Interval: Here you can define the intervals day(s), week(s), month(s) and year(s) at which the event is repeated.
Recurrences: If you enter a value greater than 0 here, the event will not be displayed after the specified number of repetitions.
Enclosures
Enclosures, also called “Enclosures” in the context of RSS feeds, are files that are linked to an event; these files are both exported in the RSS feed and offered for download on the website.
Add Enclosures: Here you can activate the adding of attachments.
Enclosures: Here you select the files you want to link to the event.
Expert Settings
CSS class: Here you can add a CSS class to the event.
Disable comments: Here you deactivate the comment function for an event.
Publish settings
As long as an event is not published, it is not displayed in the front end. You already know this behaviour from pages and articles. In addition to the manual publication you have the possibility to activate events automatically at a certain date.
Publish event: Here you can publish the event.
Show from: Here you activate the event on a specific date.
Show until: Here you deactivate the event on a certain date.
Content for events
After we have made the settings for the event, we can add content elements for the output in the “event reader”,
click on the desired event ![]() or
or
![]() and then on
and then on
![]() New.
New.
In the events, all content elements of Contao are available to you.