Users
Up to now we have worked exclusively as an administrator who has access to all areas and elements of the system. However, a user will usually only be given access to the resources that he or she actually needs for a specific task.
Normal users, unlike administrators, have no rights at all by default and are only allowed to do what you explicitly allow them to do. The very comprehensive rights management in Contao allows you as an administrator to not only restrict access to certain back end modules, but also to disable every single input field if necessary.
User groups
Each user can be a member of several user groups and automatically inherits all rights assigned to these groups. The different permissions are added together so that a member of groups A and B receives the sum of the permissions of both groups - of course only if both groups are active.
Allowed modules
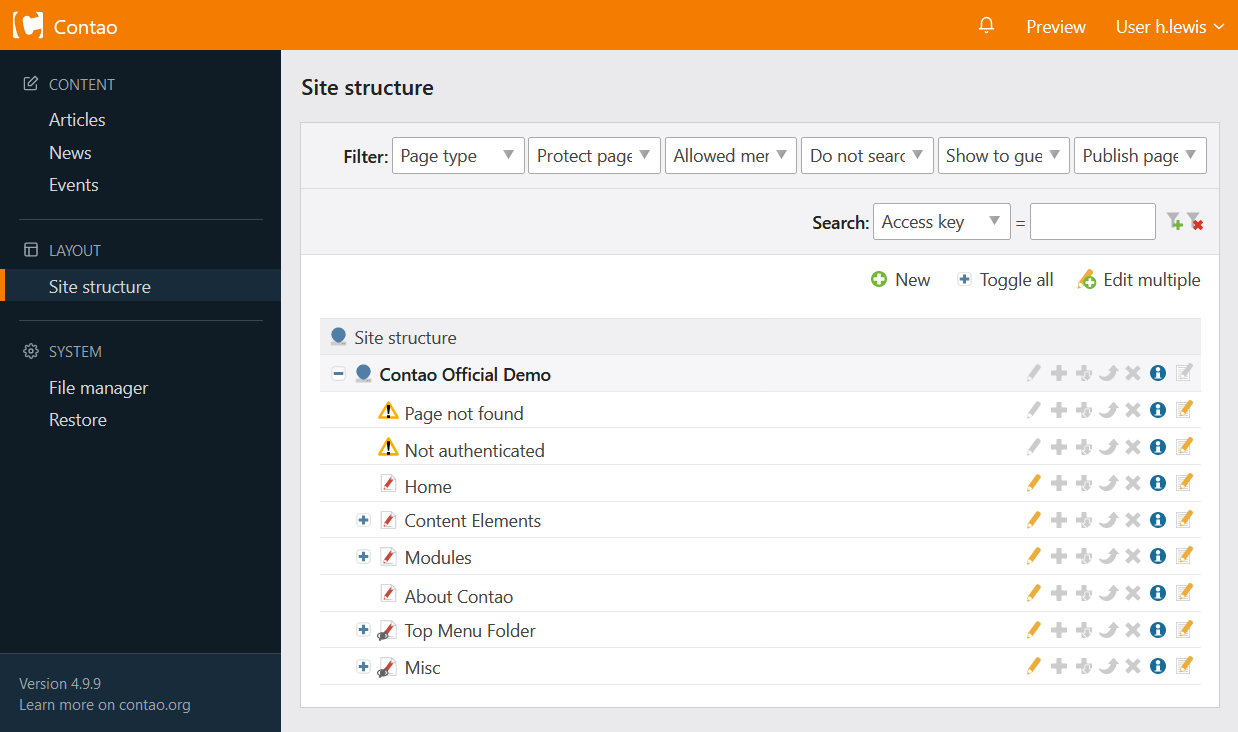
The back end navigation is created dynamically based on user rights, but back end modules that have not been unlocked do not appear in the back end navigation for reasons of clarity. Access to the theme modules can be controlled separately.
Back end modules: This is where you define access to the back end modules.
Theme modules: Here you define access to the sub-modules of the Theme Manager.
since 5.3 Front end modules: This is where you define access to the front end modules.
Allowed elements
Content elements: Here you define the access to content elements.
Form fields: This is where you define access to form fields.
Pagemounts
Mounting a file system so that a user can access it is called “mounting” on the computer. Similarly, a “pagemount” is the page from which a user gains access to the page structure.
Pagemounts: Here you select the pagemounts of the group.
Allowed page types: Here you can define which page types the members of the user group are allowed to create, see Page Types.
Filemounts
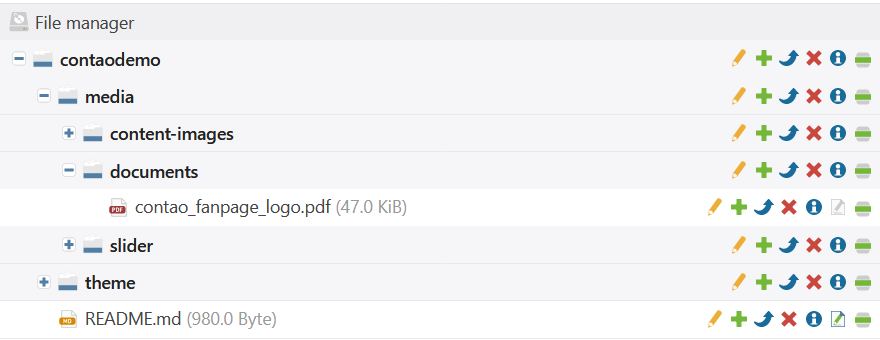
Similar to the pagemount, which determines the entry point into the page structure, the filemount determines the entry point into the file system. The user cannot access folders outside the filemount.
The user only sees the folders files/public/media/content-images, files/public/media/documents and
files/public/media/slider any subfolders they may contain. All other directories, which are on the same or a higher
level, are not displayed
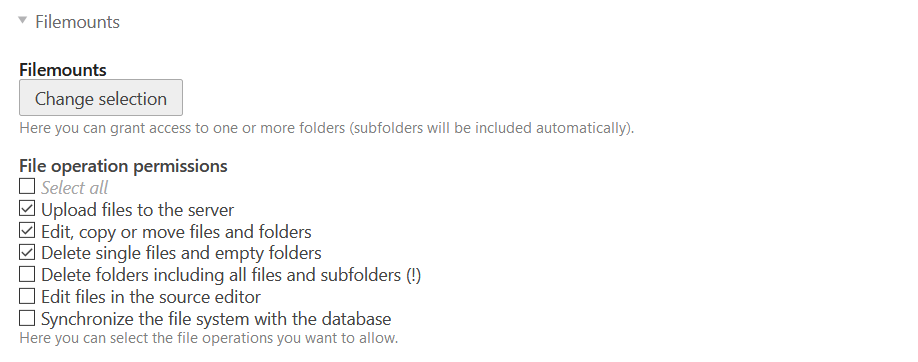
Filemounts: Here you select the filemounts of the group.
File operation permissions: Being able to see a directory and the files it contains does not mean that a user is allowed to edit them. You can specify what is possible with the mounted resources here.
| Operation | Explanation |
|---|---|
| Upload files to the server | The user may transfer certain files to the server via the file management (upload). You can define the allowed files in the back end settings. |
| Edit, copy or move files and folders | The user may rename, duplicate and move files and directories. |
| Delete single files and empty folders | The user may delete individual files and empty directories (not recursively). |
| Delete folders including all files and subfolders (!) | The user can delete files and directories recursively, i.e. including all the sub-folders and files they contain. |
| Edit files in the source editor | The user is allowed to edit the content of certain files with the source code editor directly on the server. You can define the allowed files in the back end settings. |
| Synchronize the file system with the database | The user can synchronize the file system with the database. |
Image sizes
Here you can restrict access to the different image sizes.
Form permissions
Allowed forms: Here you define which forms the members of the user group can access.
Form permissions: Here you define whether the members of the user group can create new forms or delete existing ones.
FAQ permissions
Allowed FAQ categories: Here you define which FAQ categories the members of the usergroup are allowed to access.
FAQ category permissions: Here you define whether the members of the user group can create new categories or delete existing ones.
News permissions
Allowed archives: Here you define which news/blog archives the members of the user group are allowed to access.
News permissions: Here you can define whether the members of the user group can create new news/blog archives or delete existing ones.
Allowed news feeds: Here you define which RSS feeds the members of the user group are allowed to access.
News feed permissions: Here you define whether the members of the user group may create new RSS feeds or delete existing ones.
since 5.3 The news feeds are no longer created in the archive, but via the news feed page type. If members of the user group are to access the feeds, they must be granted access in the pagemounts.
Events permissions
Allowed calendars: Here you define which calendars the members of the user group are allowed to access.
Calendar permissions: Here you define whether the members of the user group are allowed to create new calendars or delete existing ones.
Allowed calendar feeds: Here you can define which RSS feeds the members of the user group can access.
Calendar feed permissions: Here you define whether the members of the user group are allowed to create new RSS feeds or delete existing ones.
Newsletter permissions
Allowed channels: Here you define which newsletter channels the members of the user group are allowed to access.
Channel permissions: Here you can define whether the members of the user group can create new newsletter channels or delete existing ones.
Allowed member groups
Allowed member groups: Members of this group can be used in the front end preview.
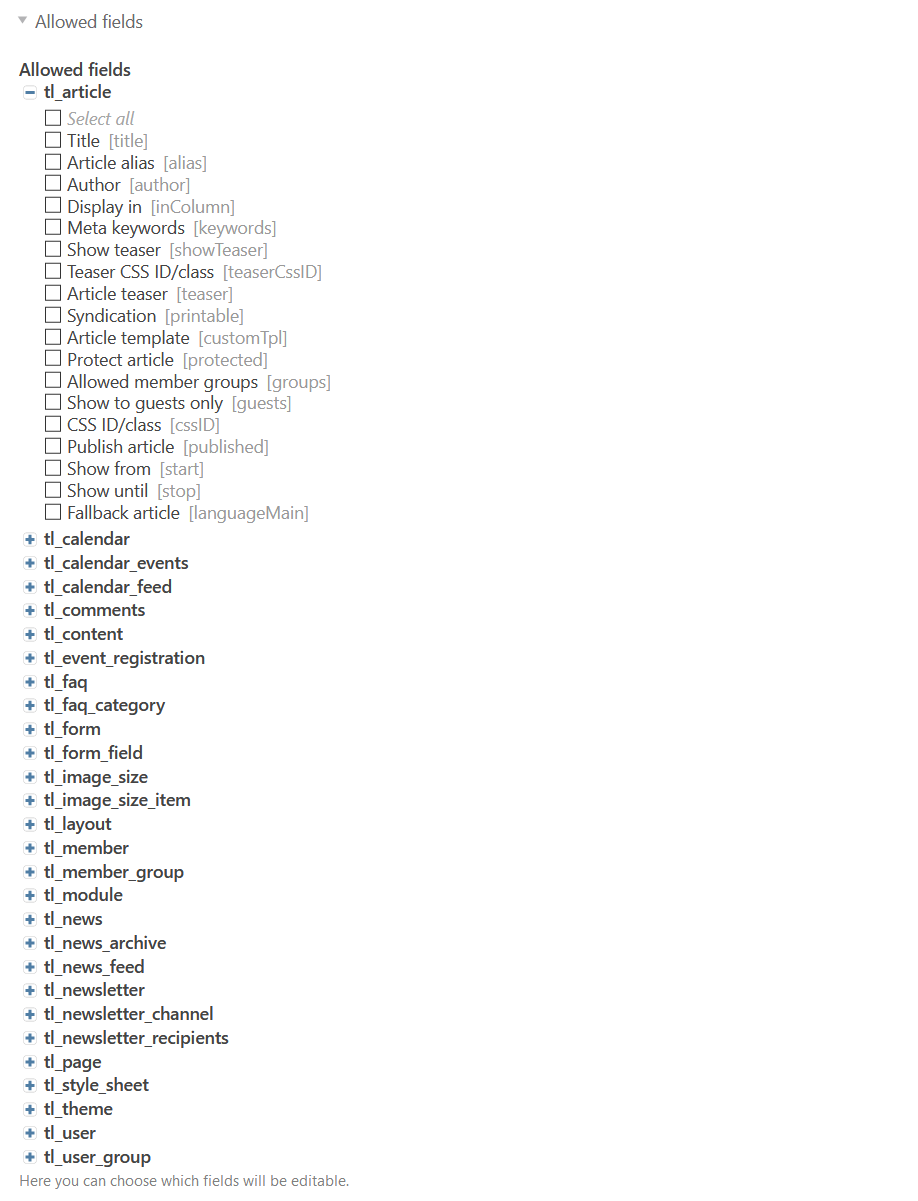
Allowed fields
At the beginning of the section it was mentioned that by default, normal users have no rights at all (“deny all”) and you as administrator have to explicitly enable all access. This also applies to the individual input fields of each module or table listed here.
Allowed fields: Here you choose the allowed fields.
With the allowed fields you can easily create workflows, e.g. by not unlocking the fields for publishing an article or a news item for editors. No editor can publish something without you or an editor-in-chief having seen it first.
Group settings
User groups can be deactivated manually or automatically at a specific time. No more rights can be inherited from a deactivated group.
Deactivate: Here you can deactivate the group.
Activate on: Here you activate the group on a specific day at 0:00.
Disable on: Here you deactivate the group on a specific day at 0:00.
User
With the “Users” module you can manage user accounts. Users can login with their username and password in the back end and inherit the permissions of the user groups assigned to them.
The user name and email address must be unique, i.e. they can only be assigned once.
Name and e-mail
Username: Here you define the user name.
Name: Here you enter the first and last name of the user.
E-mail address: Enter the user’s e-mail address here.
Back end Settings
Every user can customize the back end to his or her personal preferences.
Back end language: Here you set the back end language.
File uploader: Here you can choose between “DropZone” and the “Standard Uploader”.
Show explanations: By default, Contao displays a short explanation below each input field which you can disable here if needed.
Show thumbnail images: Here you can disable the thumbnails in the file overview of the file manager to make the directory structure load faster.
Enable the rich text editor: Here you can disable the Rich Text Editor.
Enable the code editor: Here you can disable the code editor.
Do not collapse content elements: Here you can prevent the content elements from being displayed collapsed in the back end preview.
Back end Theme
Back end teme: Here you can change the back end theme, if there is another one.
Password settings
Password: Here you can assign a password to the user.
Password change required: Here you can force the user to change his password at the next login.
Two-Factor Authentication
Users can enable two-factor authentication to further secure the account. In addition to the user name and password, a verification code (“Time-based One-time Password”) must be entered. This one-time password must be generated by a two-factor app such as 1Password, Authy, Google Authenticator, Microsoft Authenticator, LastPass Authenticator, or any other TOTP app.
Users can be required to use two-factor authentication. To do this, the following configuration must be
config/config.ymladopted in the:
contao:
  security:
    two_factor:
      enforce_backend: true
Administrator
Make the user an administrator: Here you can make the user an administrator. The assignment to a group is then no longer necessary.
User groups
Among other things, this is where you define the group membership of the user. The first group, i.e. the one at the top of the selection menu, is the main group, which is automatically set in the access rights when creating new pages, for example.
User groups: Here you define the group membership of the user.
Permission inheritance: There are the following three possibilities for the assignment of rights:
| Mode | Declaration |
|---|---|
| Use group settings only | Only the rights of the active groups are inherited. |
| Extend group settings | The rights of the active groups are inherited and additionally extended by individual rights. |
| Use individual settings only | Only individual rights are used. |
Individual rights are configured in the same way as user groups.
Account settings
Just like user groups, users can be deactivated manually or automatically at a certain point in time. A deactivated user can no longer log on to the back end.
Deactivate: Here you can deactivate the user.
Activate on: Here you activate the user on a specific day at 0:00.
Deactivate on: Here you deactivate the user on a specific day at 0:00 a.m.
Unlock pages and articles
Giving access to pages and articles so that they can be processed in the back end often leads to confusion in practice, because the necessary authorizations have to be set at different places in the system.
In order to unlock certain pages and to allow editing of articles on these pages, you have to create the appropriate prerequisites in the user administration as well as in the page structure.
Prerequisites in the user administration
First you need a user group, in which you activate the modules “Page structure” and “Articles” and have to include the pages to be edited as pagemount. This way you create the conditions for a user to access the page tree and see certain pages or articles there.
Then you have to activate tl_article and tl_content unlock the input fields of the tables tl_page in the user
group under “Allowed fields”. In this way you create the conditions for the user to see more than just an empty page,
for example, when he wants to edit an article.
Finally you have to create a user and assign him to the group.
Requirements in the page structure
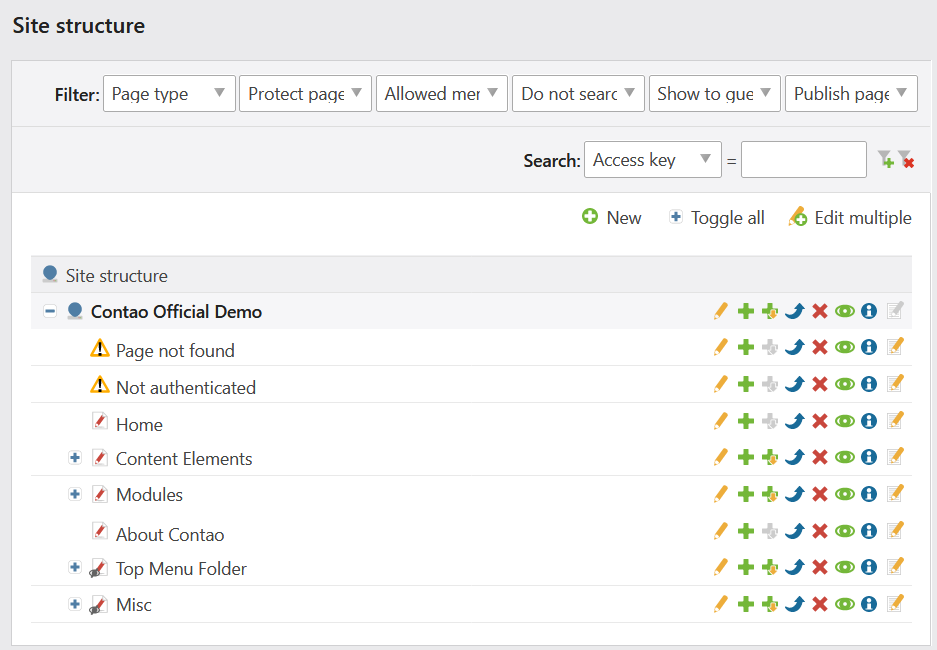
In section Access Rights, you have already learned that each page belongs to a specific user and group, and that there are different levels of access based on that.
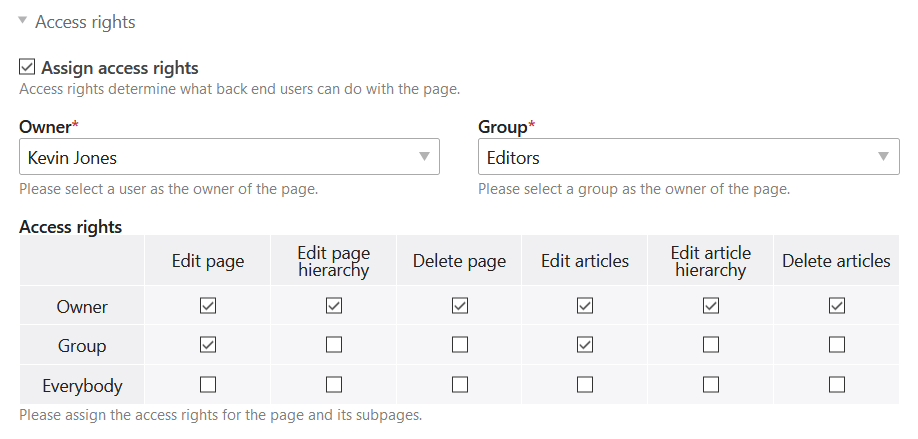
For example, this page belongs to the user Helen Lewis who can edit, move or delete it and the articles it contains.
Other users in the group Editors may only edit the articles, but not the page itself.
So you have to assign access rights to the pages that a user should be able to edit or create articles on and assign them either to the user or to his group. In this way you create the conditions for a user to be able to click on the corresponding navigation icons.