Contribute to the documentation
Before your first contribution
Before you can contribute to the documentation, you need to do the following:
- Create a free account at GitHub. GitHub is a version control service for software projects using Git and is home to among other things, the Contao documentation.
- The documentation is written in Markdown, familiarize yourself with the syntax and formatting options of this markup language. familiar with it. In addition, at the beginning of the document you have the possibility to maintain appropriate variables and metadata.
Correct small errors
If you find a typo while reading the documentation or want to reword something, the easiest way to do so is to easiest way to do this is directly through GitHub.
Edit the page and create a fork of the repository
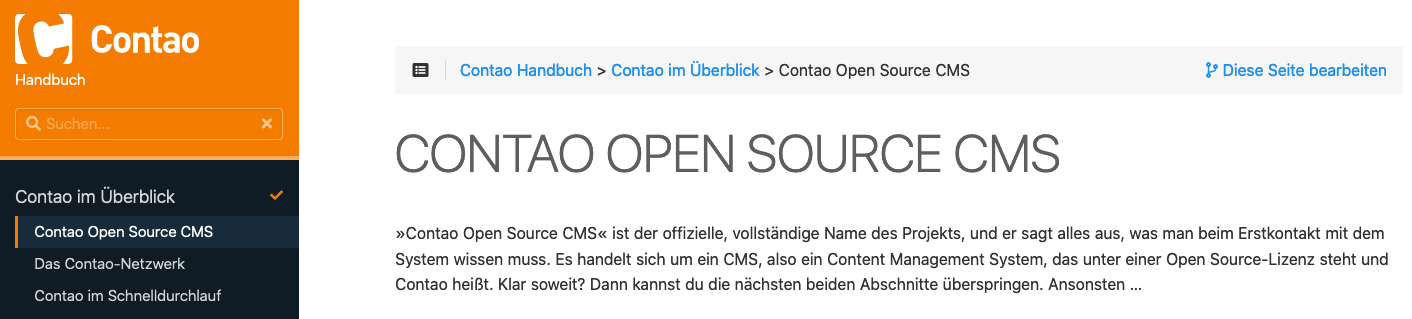
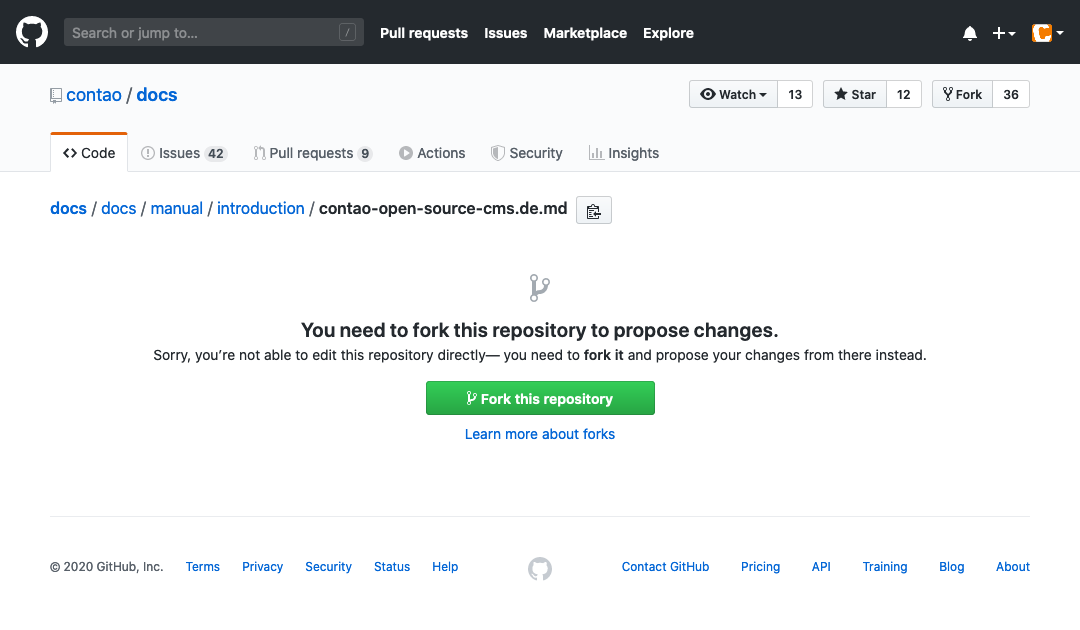
Click on the “Edit this page” link in the upper right corner and you will be redirected to GitHub:
On your first post, you will be asked to fork from the repository “contao/docs”, click on “Fork this repository”.
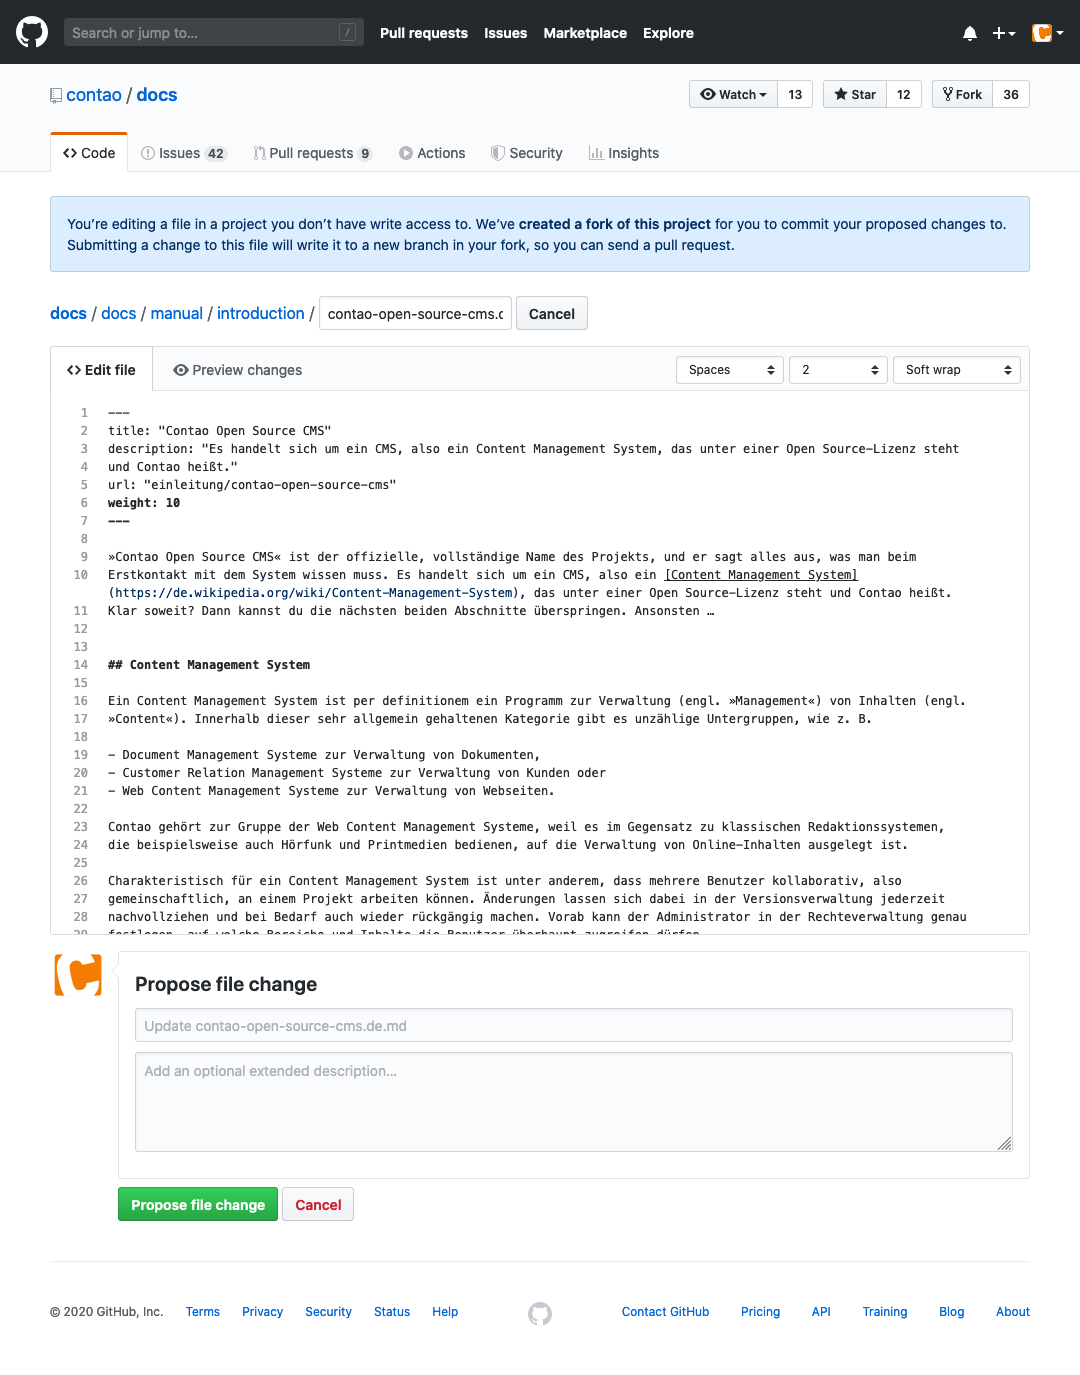
Edit content
Edit the content, describe your changes and click the “Propose file change” button.
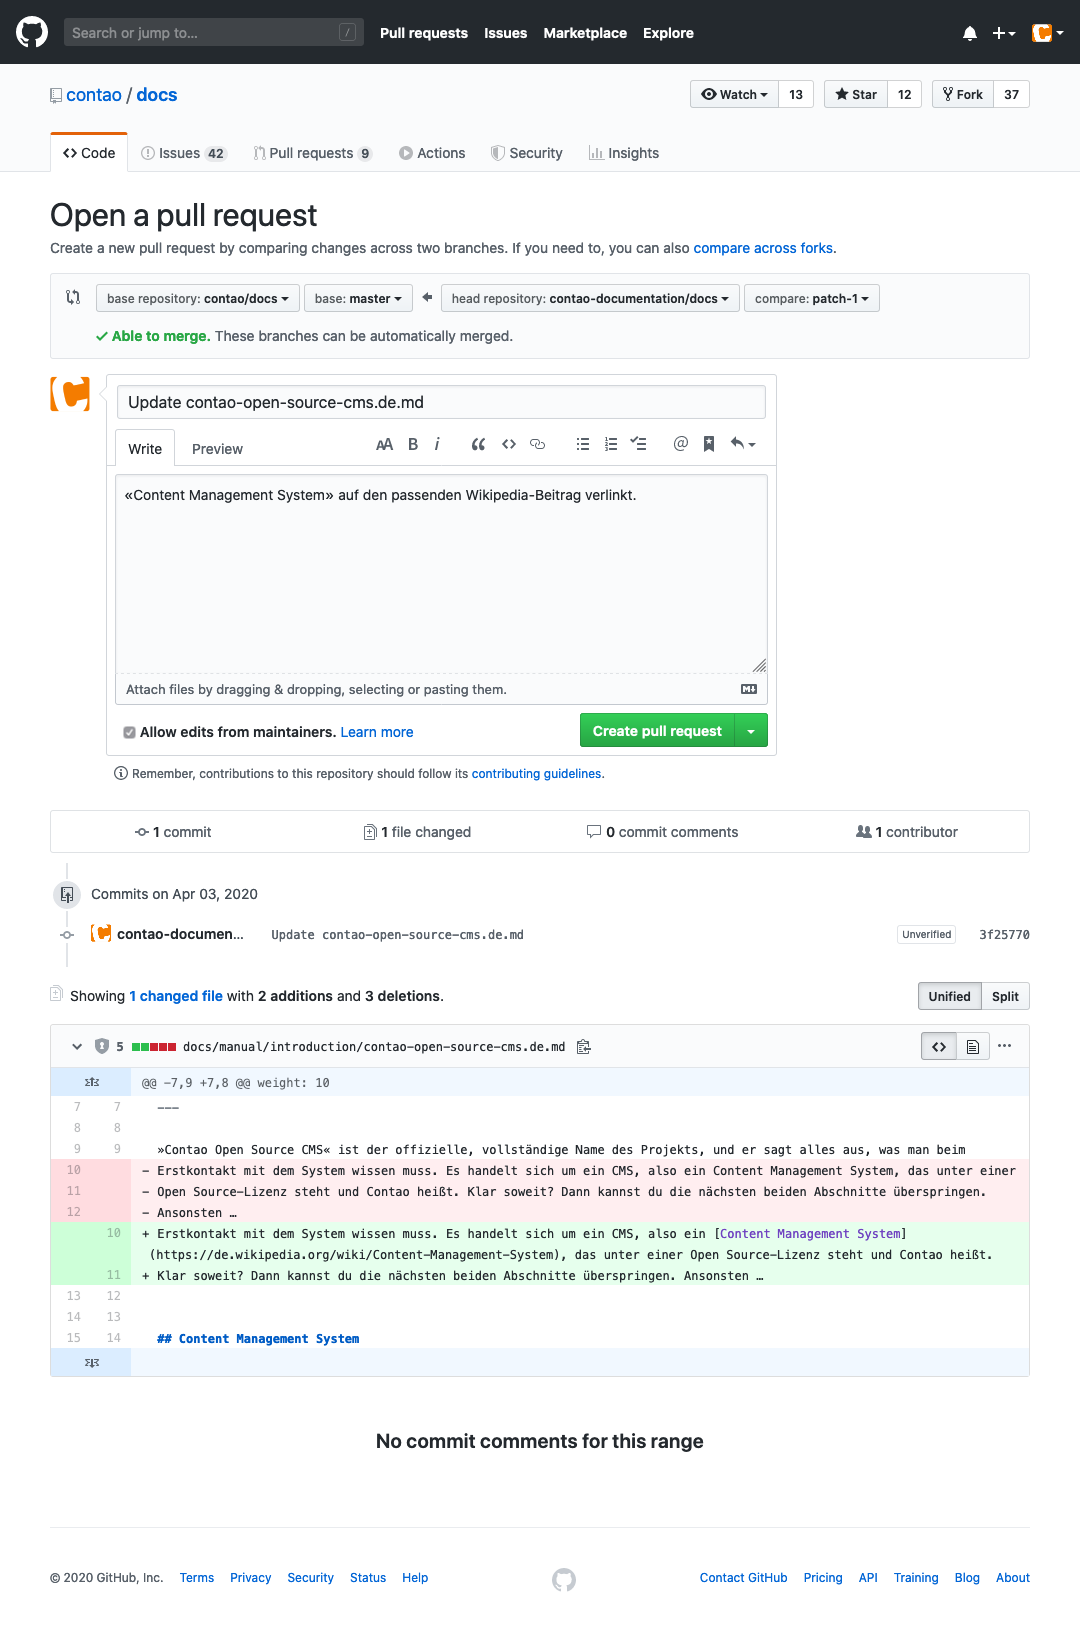
Create branch and commit
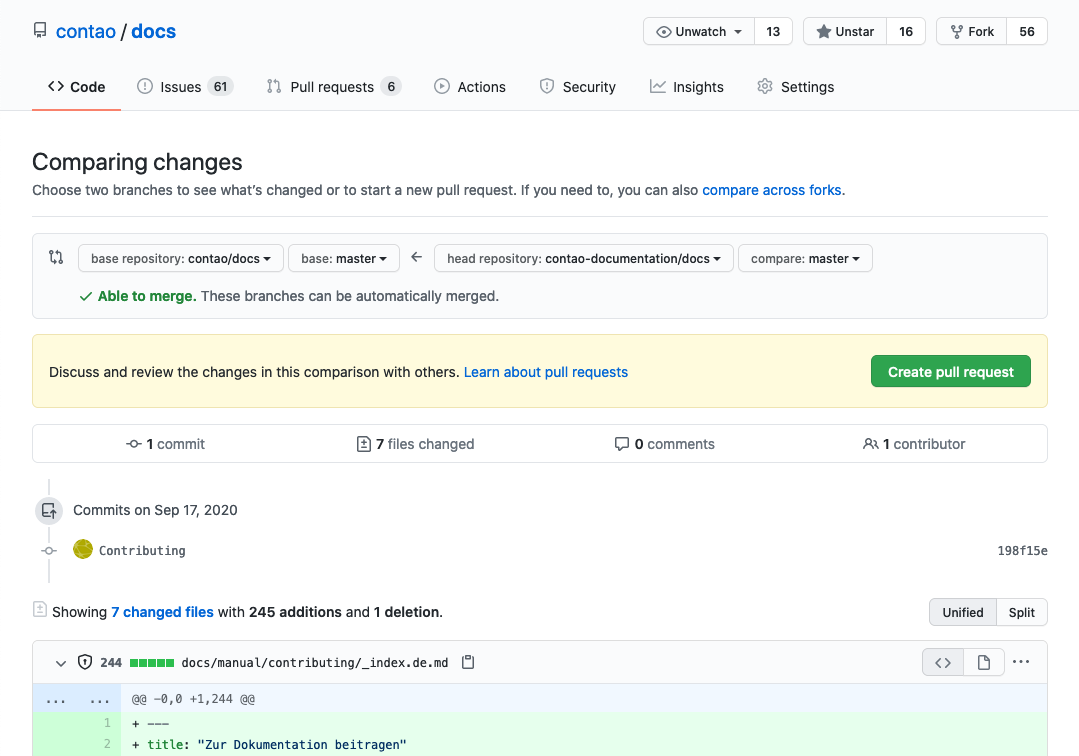
GitHub will now create a new branch within your fork and a commit for your changes and will show a preview of your changes will be displayed:

If everything is correct, click the “Create pull request” button.
Adding further changes before the pull request
If you want to edit more content before the pull request, for example by making adjustments to corresponding translations, switch to your fork instead and select the newly created branch. Here you can make your additional changes and comment them.
Then you can finally start the pull request via “Contribute/Open pull request”.
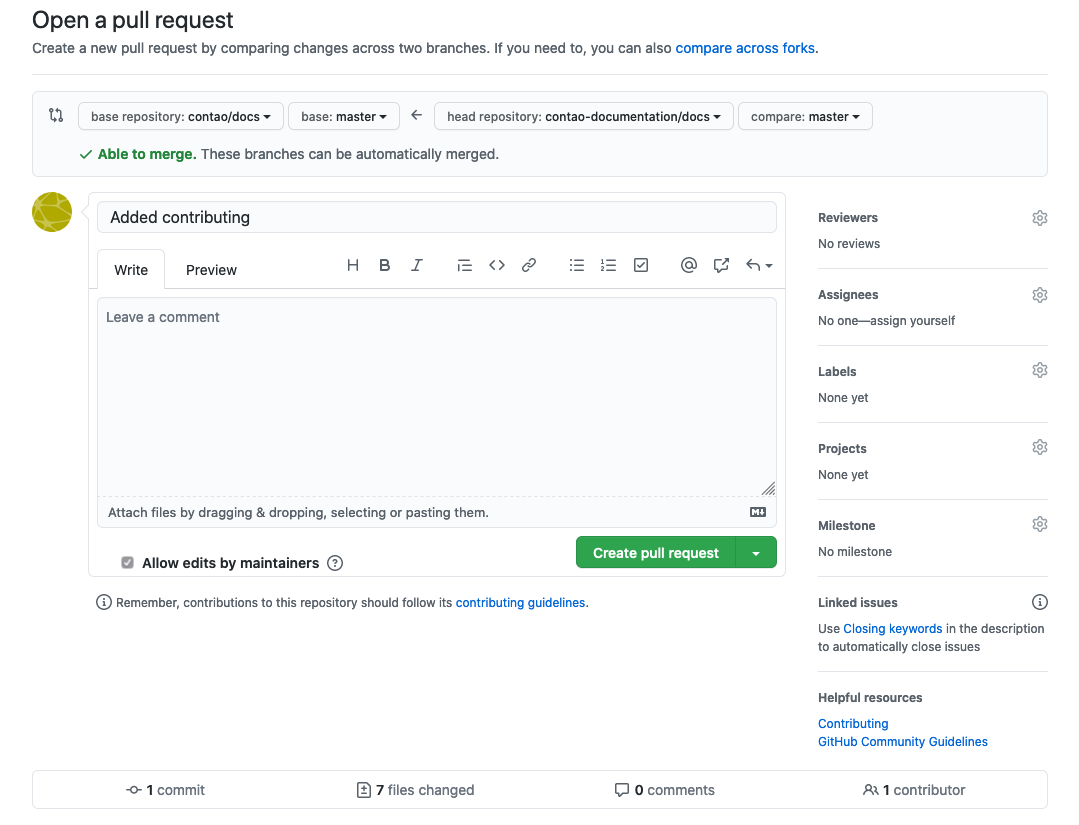
Create pull request
Since you do not have permissions to make changes directly to the official repository, you make a request to commit your changes to the official repository.
You can make final adjustments to your pull request if necessary. Click the “Create pull request” button again.
Congratulations! You have just created a pull request for the official Contao documentation! The community will now review your pull request and (possibly) suggest changes.
Fork update
If you want to propose further changes, check first if your fork is up to date. You can then sync your fork via GitHub using »Fetch upstream«.

Write a contribution for the documentation
If you are planning a large contribution or you prefer to work on your own computer, read on here and we will show you an alternative way to send pull requests to the Contao documentation.
Install Git
To do this, you need to install Git on your operating system.
Create a fork of the repository
If you do not have an account on GitHub yet, create one and switch to the official Contao documentation repository at github.com/contao/docs. Click on the button “Fork” to transfer the repository to your personal account. This is only necessary if you are contributing to the documentation for the first time.
Clone the forked repository
Clone the forked repository on your local machine:
Create a directory named contao and change to it with change directory.
cd contao
When cloning, you install the Hugo Learn theme as a submodule of git.
git clone --recurse-submodules git@github.com:YOUR-GITHUB-USERNAME/docs.git ./
or
git clone --recurse-submodules https://github.com/YOUR-GITHUB-USERNAME/docs.git ./
Install Hugo Site Generator
The documentation is created with the Hugo-Site-Generator, so you have to install Hugo on your system first. If you have already installed Hugo at an earlier time, it is recommended that you Update the software.
Create preview of the documentation
Creating a preview of the documentation is done with the make command. There are several commands available
available, depending on which part of the documentation you want to build.
make build-dev
make build-manual
Creates all documentation in the build directory.
make live-dev
make live-manual
Creates a live preview that automatically tracks changes in the docs directory and reloads the frontend.
reloads. The frontend is accessible via localhost:1313.
make clean
Cleans up the build directory.
Alternatively, you can create the local preview without the make command. On the console you change
to the subdirectory page and create the local preview with the command:
hugo server --cleanDestinationDir --environment manual --destination ../build/manual.
Synchronize fork with original repository
If you haven’t worked with your fork for a while, your fork may show the following message on GitHub.
message This branch is 7 commits behind contao:main..
So before you make any changes to the docs, you can make sure that your fork is synchronized with the original repository. repository.
Add the original repository once as a new remote repository and specify it as the upstream repository.
git remote add upstream https://github.com/contao/docs.git
The Remote name “upstream” can be freely selected or renamed. can also be renamed later.
Fetch the data of the upstream repository with fetch.
git fetch upstream
The commits that are different from your fork are now in separate branches in your local environment. in your local environment. With the next command, you merge them.
git merge upstream/main
Now execute the following command to update your fork.
git push
On GitHub, your fork now displays the message This branch is even with contao:main..
Create Branch
Before you edit the content, we make sure by creating your own branch (reference to a snapshot) that you can work on the documentation in parallel with others. Branches are independent development branches.
Create a new branch from the current one.
git checkout -b YOUR-BRANCH-NAME
Edit content
Now that the basic requirements for documenting have been met, you can expand the docu with your contribution.
You can find the documentation files in the docs directory of your local Hugo installation.
- The Contao developer documentation is located in the
devdirectory. - The Contao user manual is located in the
manualdirectory.
When all customizations or additions have been made, we restore them to our fork.
Transfer changes to your repository
Now the data is on your local machine and the next step is to commit it to your repository on GitHub. repository.
You can use the following command to stager all changes for the next commit.
git add .
Then you add the changes to the local repository.
git commit -m "Eine aussagekräftige Commit-Nachricht eingeben"
To send the changes to your remote repository, run the following command.
git push origin YOUR-BRANCH-NAME
After “pushing” your own new branch, you will see a link to create the pull request on the console.
Create a pull request
Access your fork on GitHub (https://github.com/YOUR-GITHUB-USERNAME/docs).
In the message, click on “Pull request.

Compare the changes and finish this step by clicking on “Create pull request”.
Confirm the creation of a pull request with “Create pull request”.
Congratulations! You have just created a pull request for the official Contao documentation! The community will now review your pull request and (possibly) suggest changes.
Make changes on an already opended Pull-Request
Find the branch, where your Pull-Request is and check it out. Say it is branch patch-4:
git checkout patch-4
Make your changes in the file in question (in the docs directory).
Stage your changes for the next commit:
git add .
Then you add the changes to the local repository:
git commit -m "A meaningful commit-message"
Send your changes to the remote repository:
git push origin patch-4
That’s it! You have made your changes to the Pull-Request.